
FotoSketcher Studio
About FotoSketcher Studio
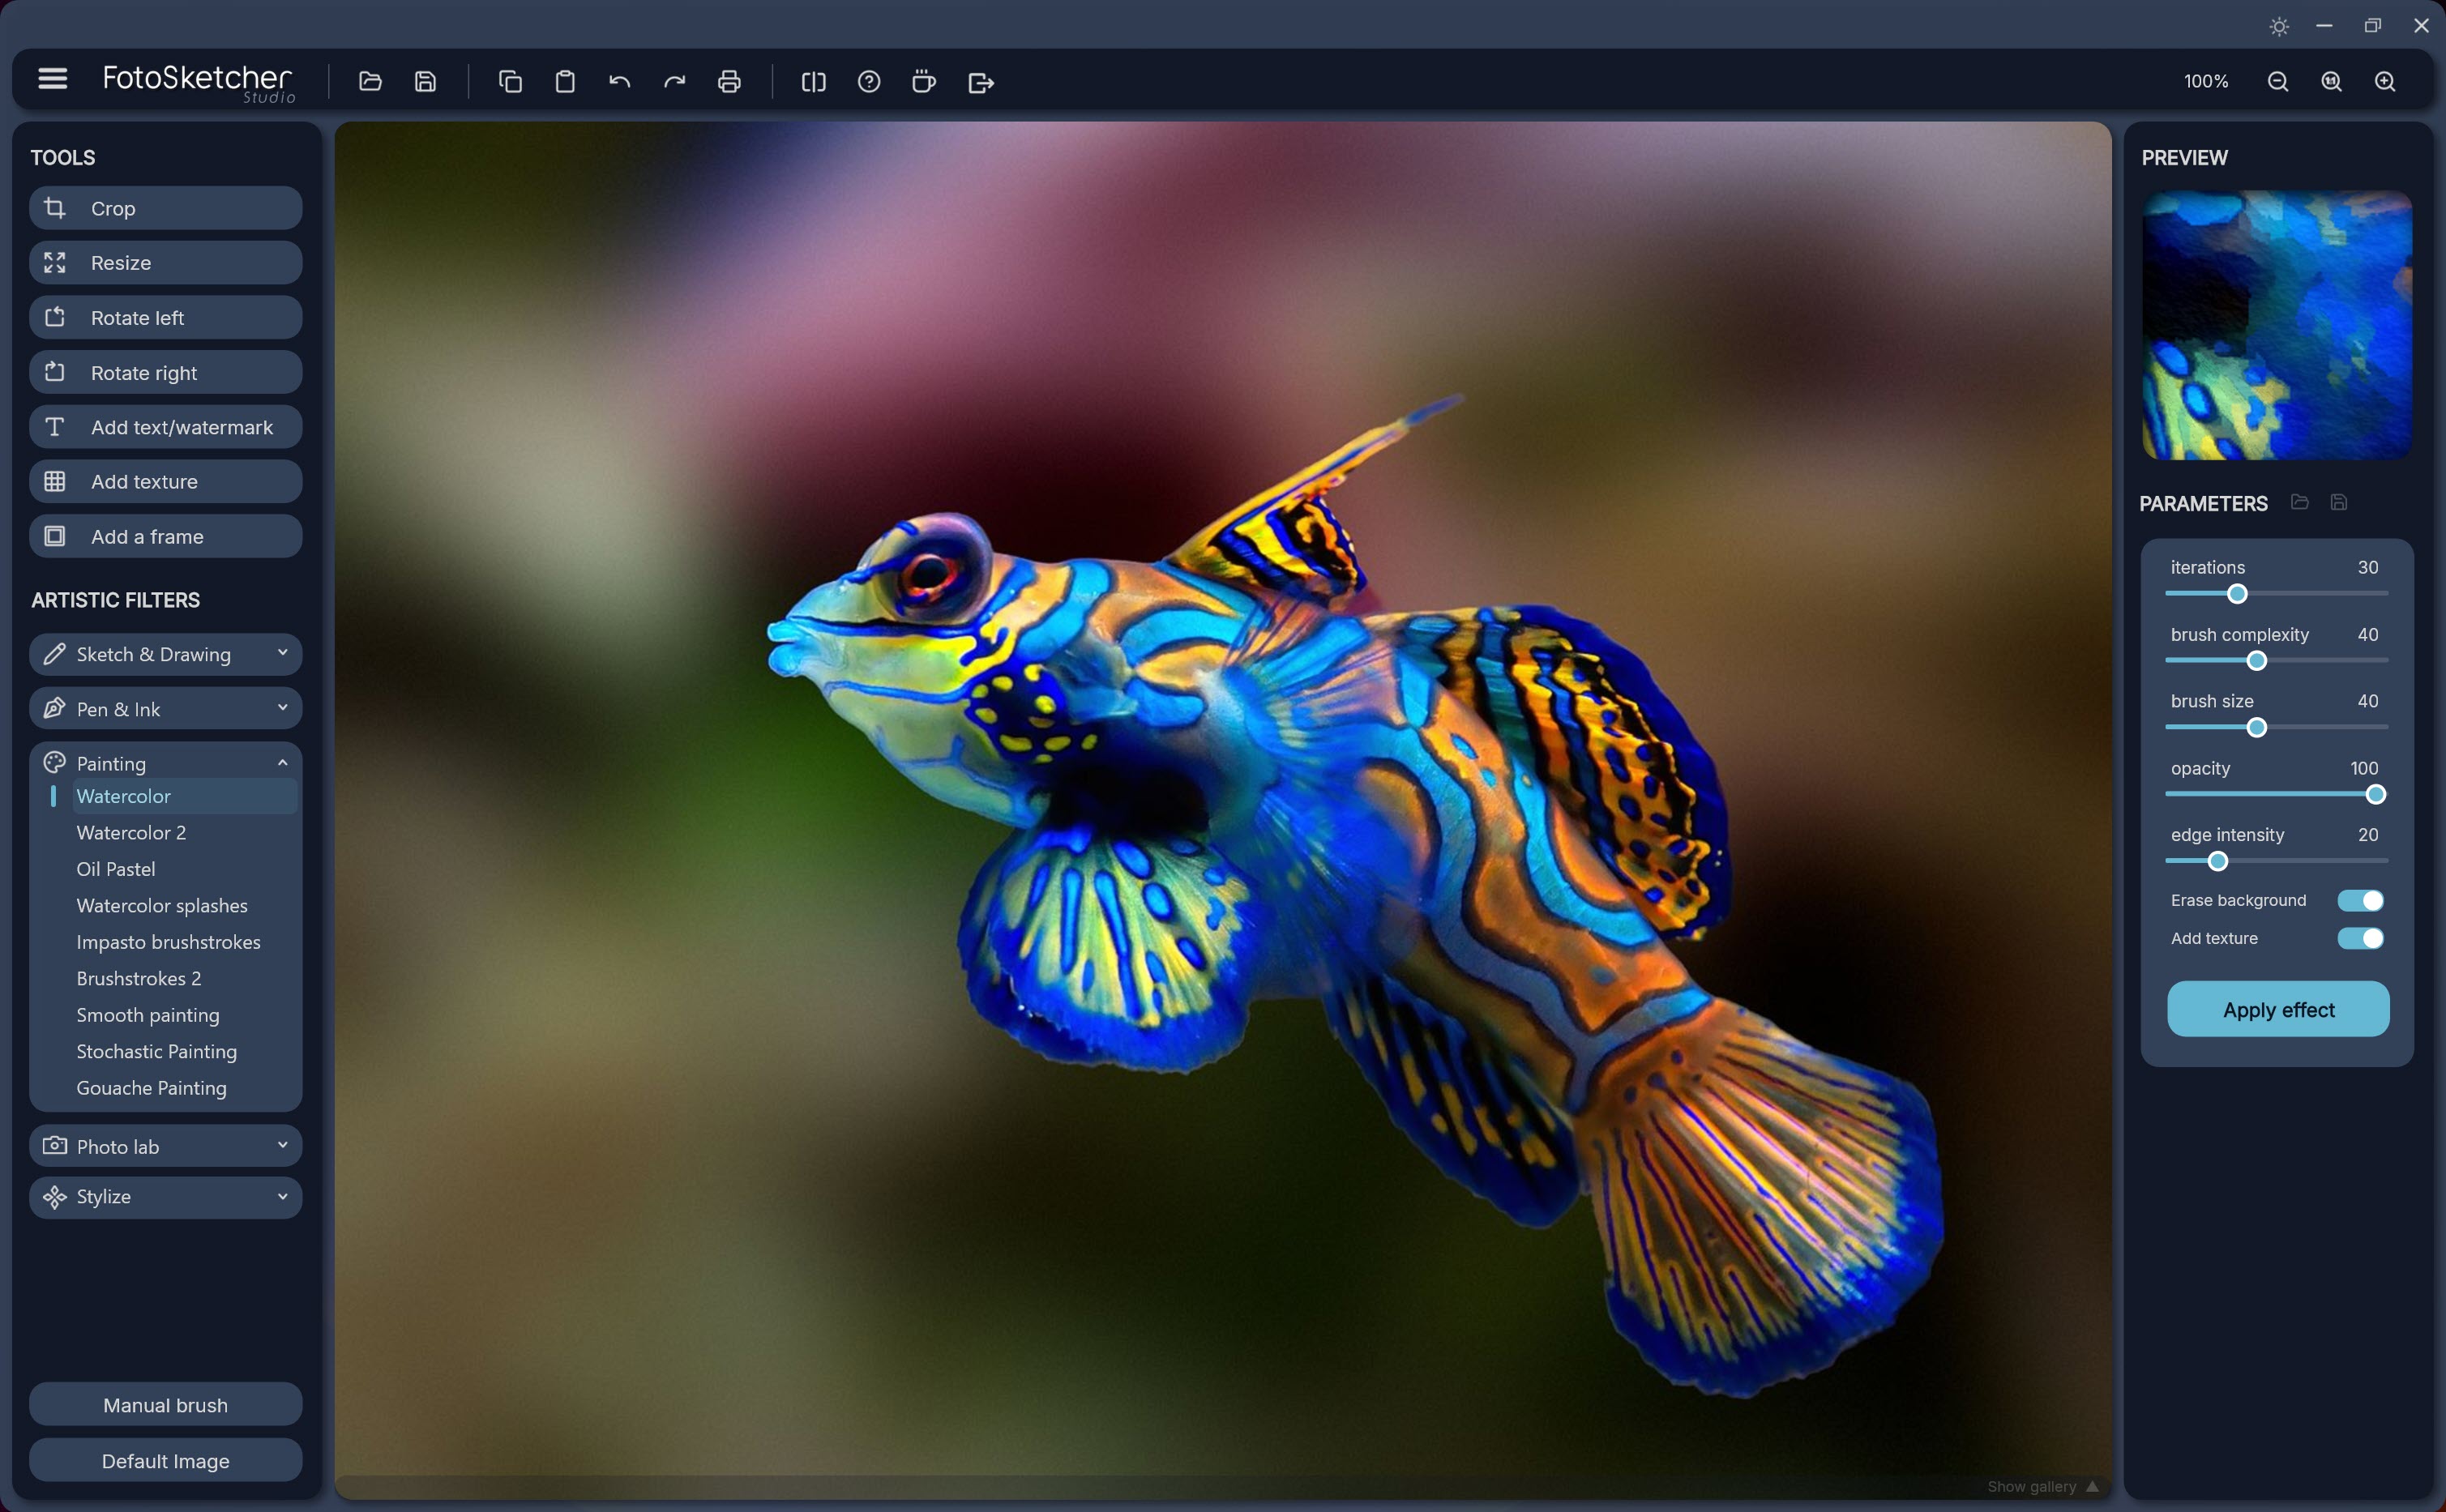
FotoSketcher Studio takes a photograph and rebuilds it as a drawing or a painting. More than twenty effects sit inside categories named after the materials they imitate, so Pencil Sketch, Pen & Ink, Painting, Stylize and Photo Lab. You open an image, click an effect, then push sliders until the preview looks the way you want it. No drawing skill required, and no layer stack to keep track of.
That places the application in an odd gap in the field. It is not a general image editor like PhotoDemon, because retouching is barely part of the job here. It is not a painting canvas either, since nothing asks you to draw.
What you get instead is a rendering engine with the knobs left exposed, and that exposure is the whole point. Where a phone filter gives you one result and a slider marked intensity, each effect here opens a panel of parameters that change how the algorithm behaves rather than just fading it in and out.
Everything else in FotoSketcher Studio exists to serve that one decision or to repeat it. You settle on an effect and a set of slider positions for a single photo, and the scripting, batch and watermarking tools then apply that judgement to twenty more files without you touching a slider again.
Effects grouped by medium rather than by mood
Pencil Sketch covers the graphite looks and includes Crosshatch, which builds tone out of overlapping sets of parallel lines. On portraits and building facades it reads convincingly like paper. On busy foliage it collapses into noise.
Painting is where most people will spend their time. Watercolour, Oil Painting and Gouache each behave differently, and Gouache is the interesting one, thick and opaque with a matte finish, good on harbour scenes and still life where you want flat blocks of colour and visible brushwork without watercolour’s transparency. Stylize is the outlier category, holding Mosaic, Circles and Triangles (all three built on the same space-filling idea) plus Cartoon.
Here is the honest part. The sliders are named after what they do to the algorithm, not after what they do to your picture, so the first hour with FotoSketcher Studio is trial and error. Flat, low-contrast phone snapshots turn to mush under the painting effects no matter how you set them. Feed it something with actual tonal separation and the same sliders produce work you would print.
Stacking two effects in two quick steps
The “do not erase background” toggle is the feature nobody mentions and everybody should. Set Cartoon’s colour intensity to zero and it draws pure outlines with no fill. Leave the toggle on, run it over a finished watercolour, and you get crisp contours on top of paint. Crosshatch accepts the same treatment, so hatching can be laid over an oil render.
It is a two-step compositing system without any of the machinery. No masks, no blend modes, and no way to go back and adjust the layer underneath once you have drawn on top of it. Order matters and mistakes are not editable, which is why Full Reset earns its keyboard shortcut.
Ctrl+Shift+N clears the working image, history, active LUT, loaded script and every slider back to a clean state without restarting the program.
Colour grading with lookup tables and Auto-Enhance
The Photo Lab category in FotoSketcher Studio holds a LUTs effect with eighteen presets built into the application, among them Cinematic, Kodachrome, Golden hour, Portrait and three separate monochrome treatments. Each one previews live, and a right-click on the preview flips it back to your original for comparison.
Custom .cube files load from disk too, so a grading profile you already built for a video grading suite transfers straight across. Small thing, but it turns the effect from a preset bin into something you can standardise on.
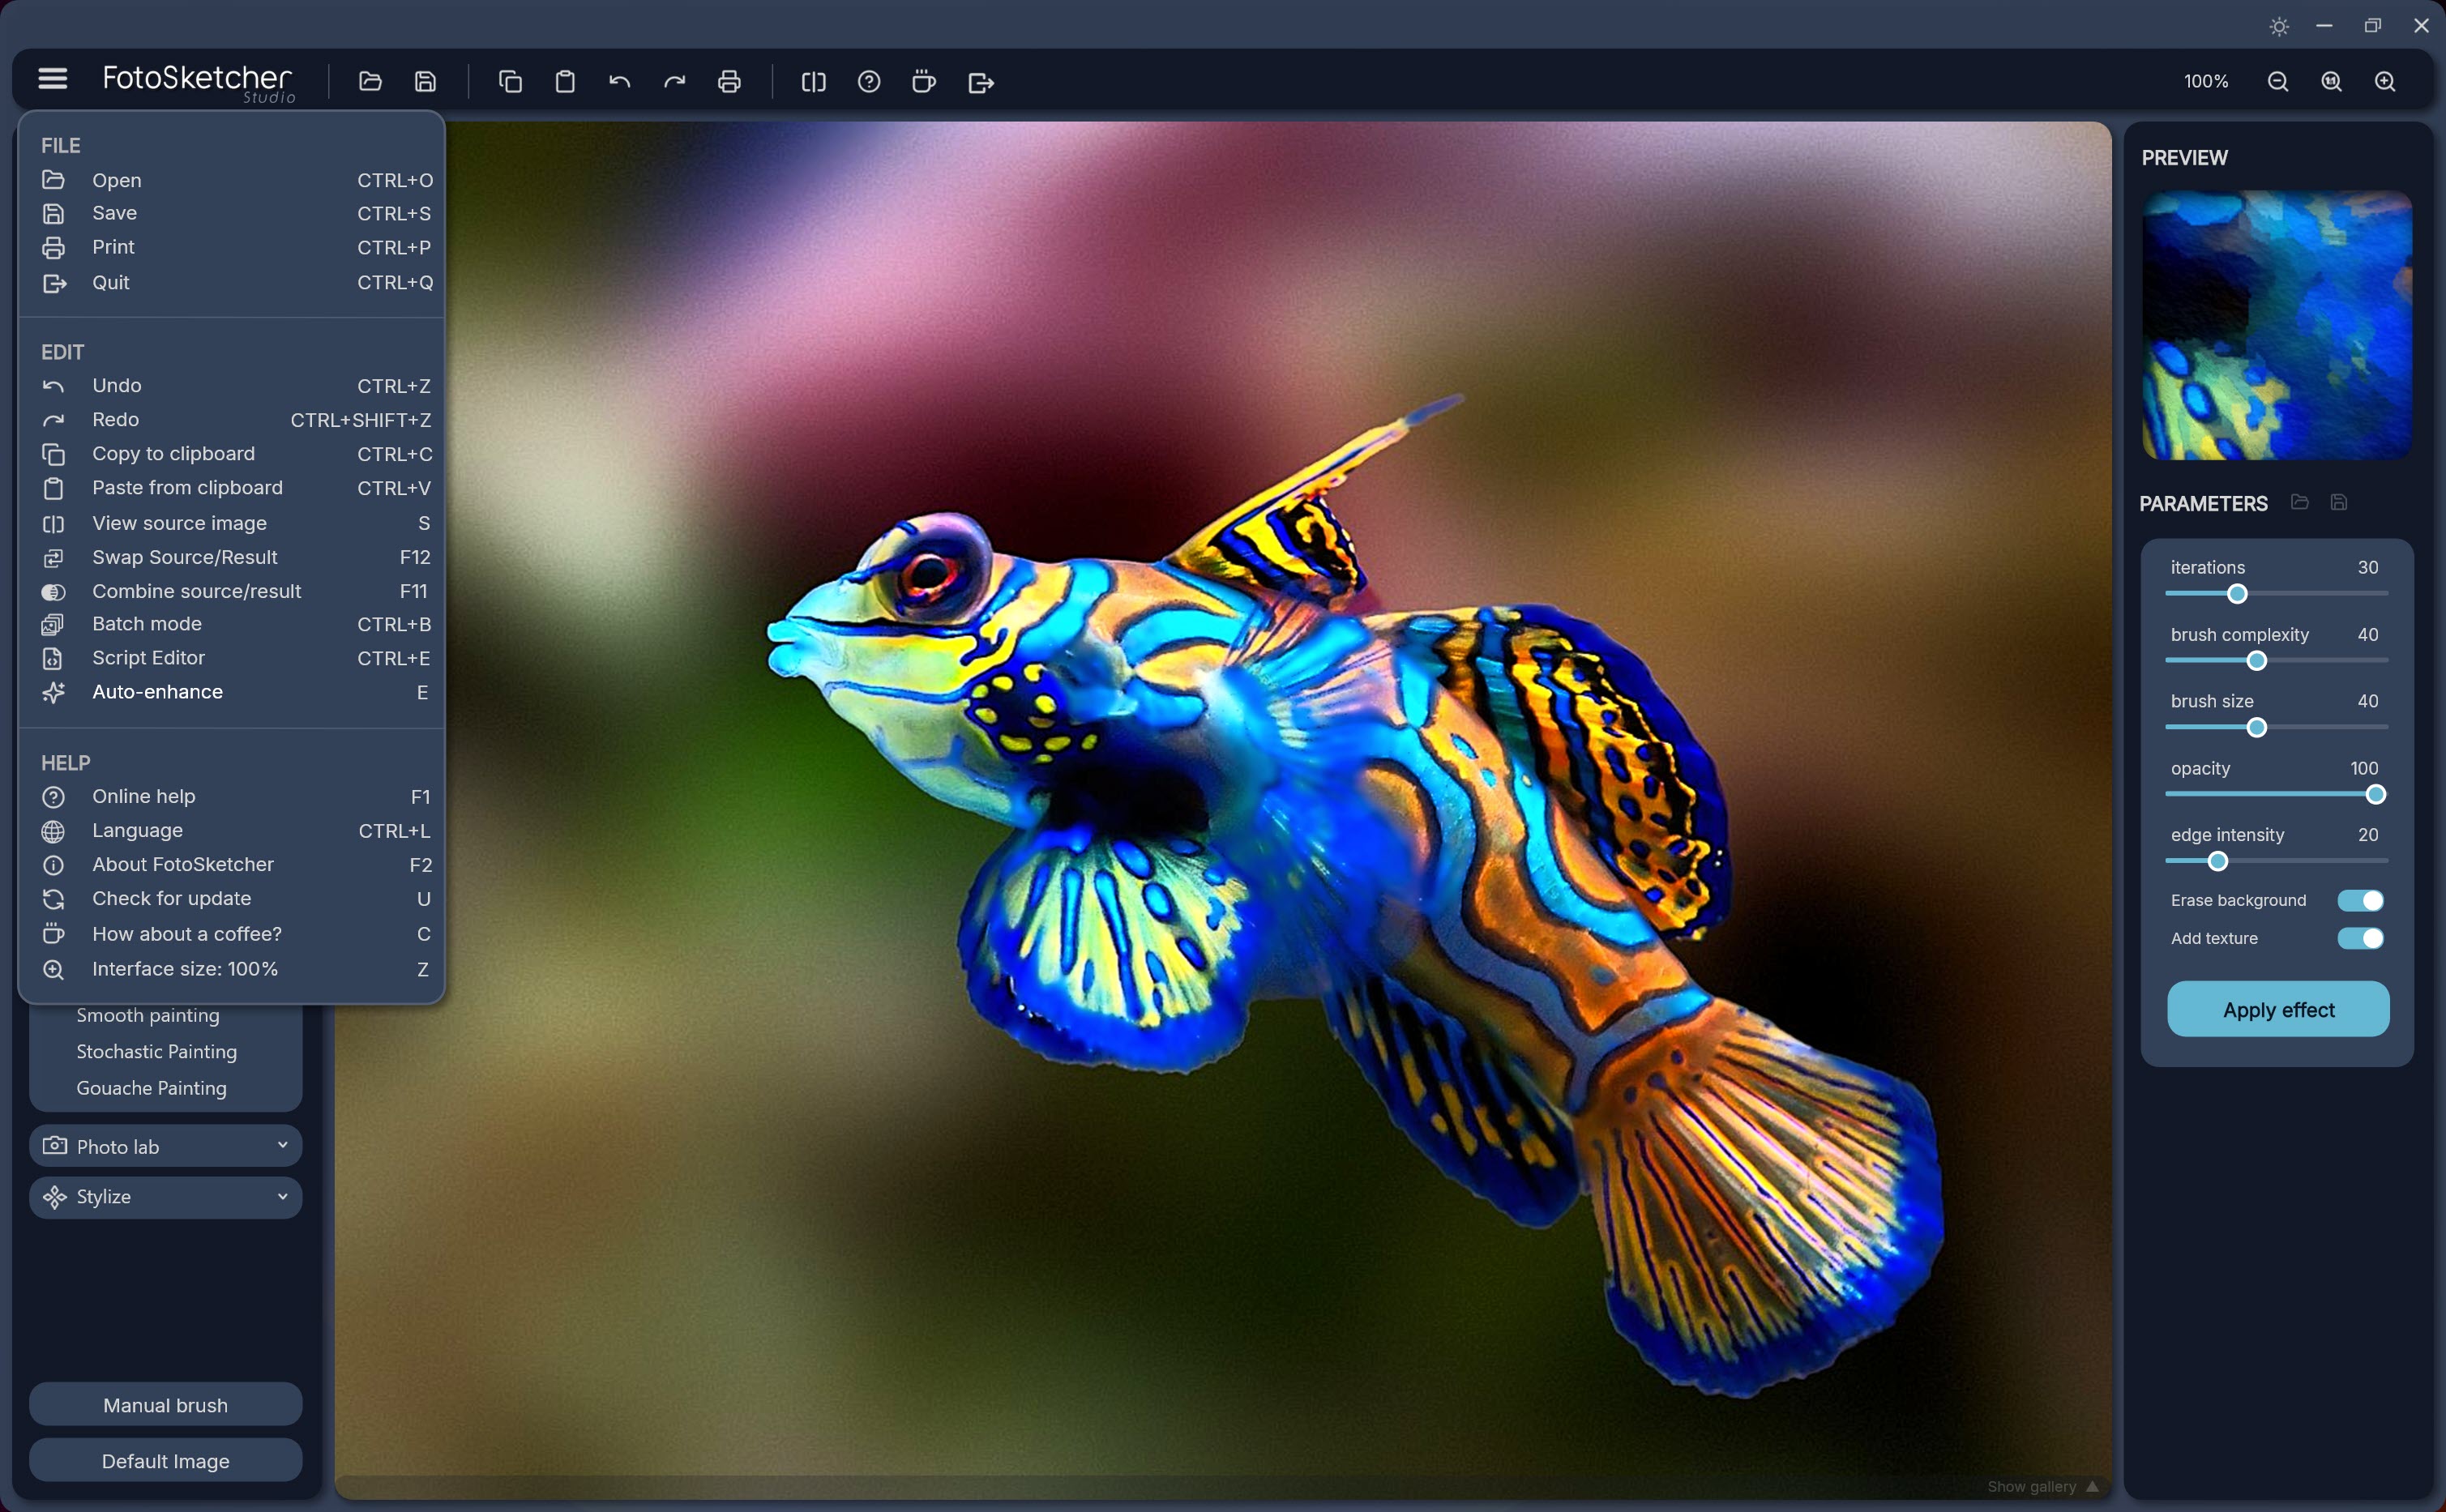
Auto-Enhance is the one I would not skip. Press E and the source photo gets an exposure, white balance and local contrast pass aimed at a dehazed, natural starting point. Make that keypress a habit before applying any painting effect, because the renderers respond badly to flat input. The LUT list itself is less thoughtful. There is no way to reorder it or mark favourites, so if you keep returning to two of the eighteen you scroll past the other sixteen every time.
What the manual brush can and cannot do
The manual brush in FotoSketcher Studio is how you stop an effect from wrecking the part of the photo that matters. Paint the effect away from a face and the eyes stay sharp while the background dissolves into brushstrokes, which is the difference between a picture that looks processed and one that looks made. Holding Ctrl and dragging with the left button pans the canvas while the brush is active, so you are not fighting the scroll bars on a large image.
But the brush is blunt. There is no pressure sensitivity and nothing resembling a selection tool, so anything finer than “roughly this area” is out of reach. When you need real local control with masks and layers, GIMP is the answer and this application is not pretending otherwise.
Comparing renders without losing the earlier ones
Every intermediate result lands in the history gallery as a thumbnail, which matters more than it sounds like it should, because getting a painting effect right takes six or seven attempts. A blue dot flags the images you have not modified yet, so your untouched originals stay easy to spot, and hovering over a thumbnail shows the filename.
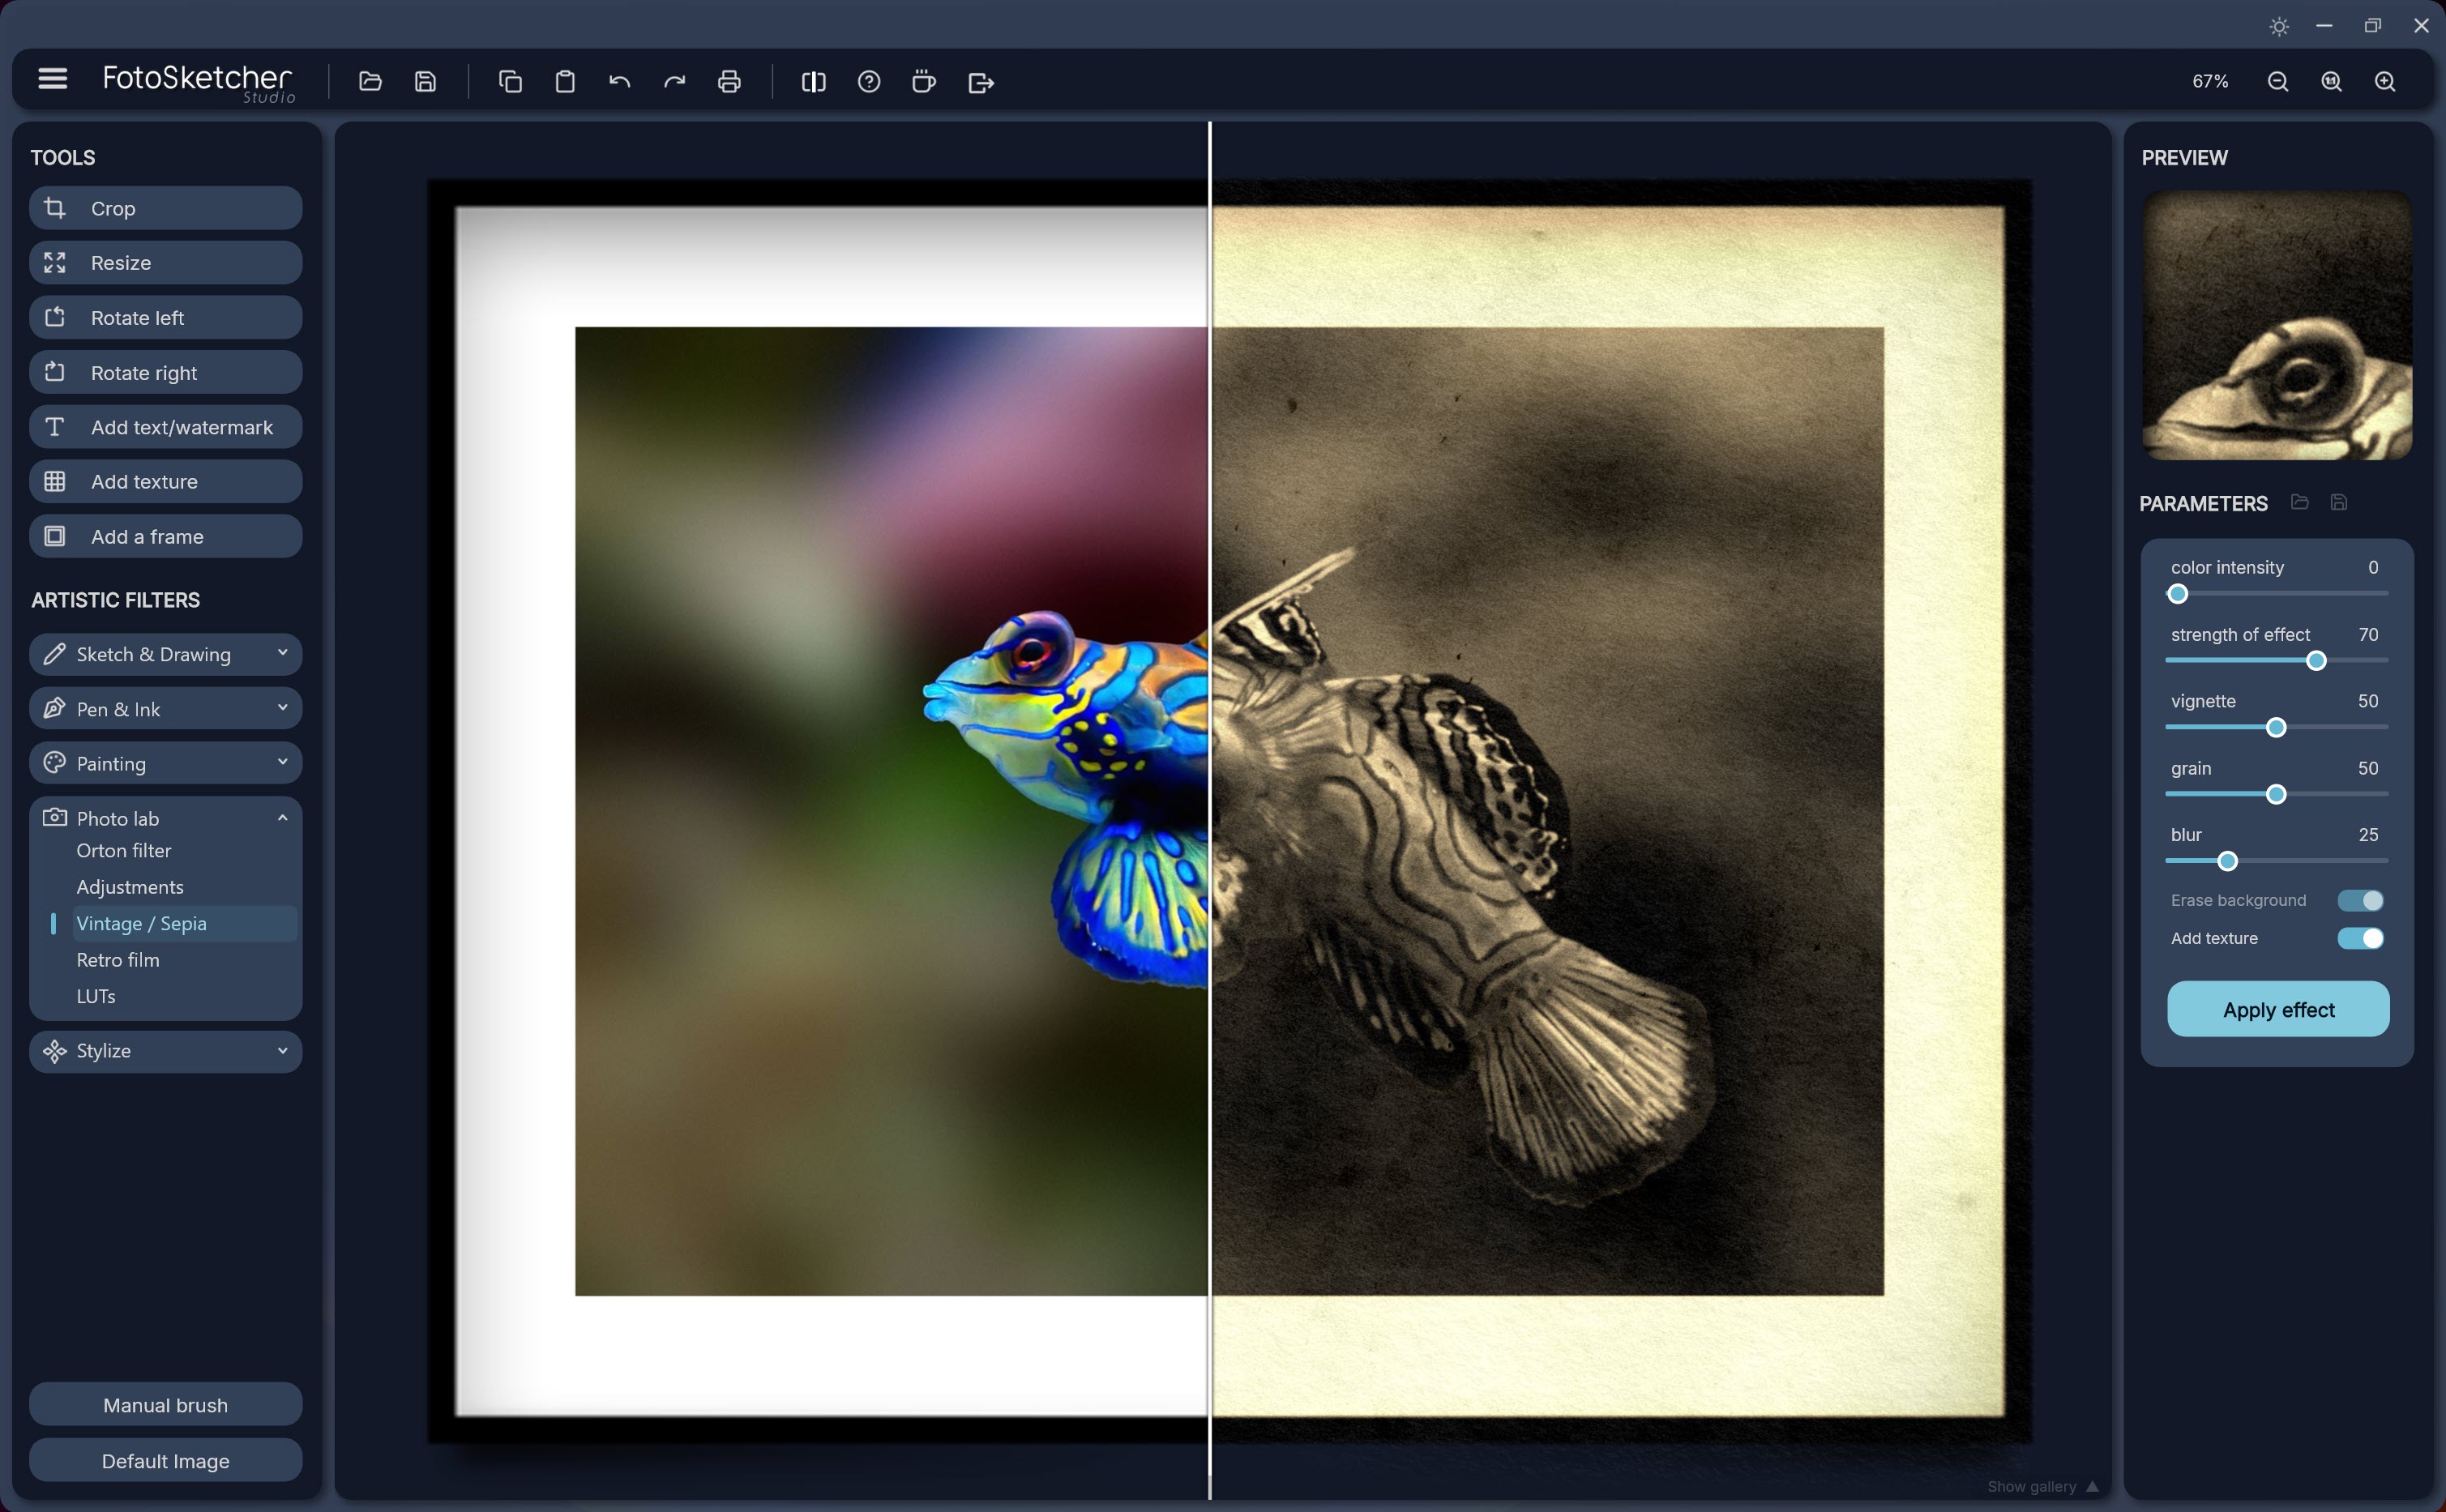
The before and after divider drags across the image, and it now stays put when you zoom rather than sliding off the edge as it once did. What you cannot do is compare two renders against each other. The divider only ever measures a result against the source, so choosing between attempt four and attempt six means clicking back and forth between thumbnails and trusting your memory.
Scripts, and running an effect across a folder
The Script Editor takes plain command lines, one per step. ENHANCE runs the auto-enhance pass, LUT_FILE loads a .cube from a path, LUT_EMBEDDED selects one of the built-in presets by name, and the effect commands cover everything in the categories. Ready-made example scripts ship inside the program, so you can read working code rather than starting from a blank window. The editor also minimises itself while a script runs, letting you watch the image build.
Batch mode applies one effect with one parameter set across an entire folder. That covers the common case, though the scripting language is a flat sequence with no conditionals and no variables, so per-image decisions are out.
For straight resizing and format conversion across hundreds of files, IrfanView still moves faster.
Signing and framing the finished piece
The text window in FotoSketcher Studio has grown into a text and watermark window. Load a transparent PNG, a JPG logo or a scanned signature, drag it into position, drag a corner to resize, and set opacity with a floating slider.
Transparent borders get cropped automatically on load, which spares you the usual fight with a logo that has half an inch of empty space baked around it. Watermarking also works inside scripts, so a folder can come out signed without further clicks.
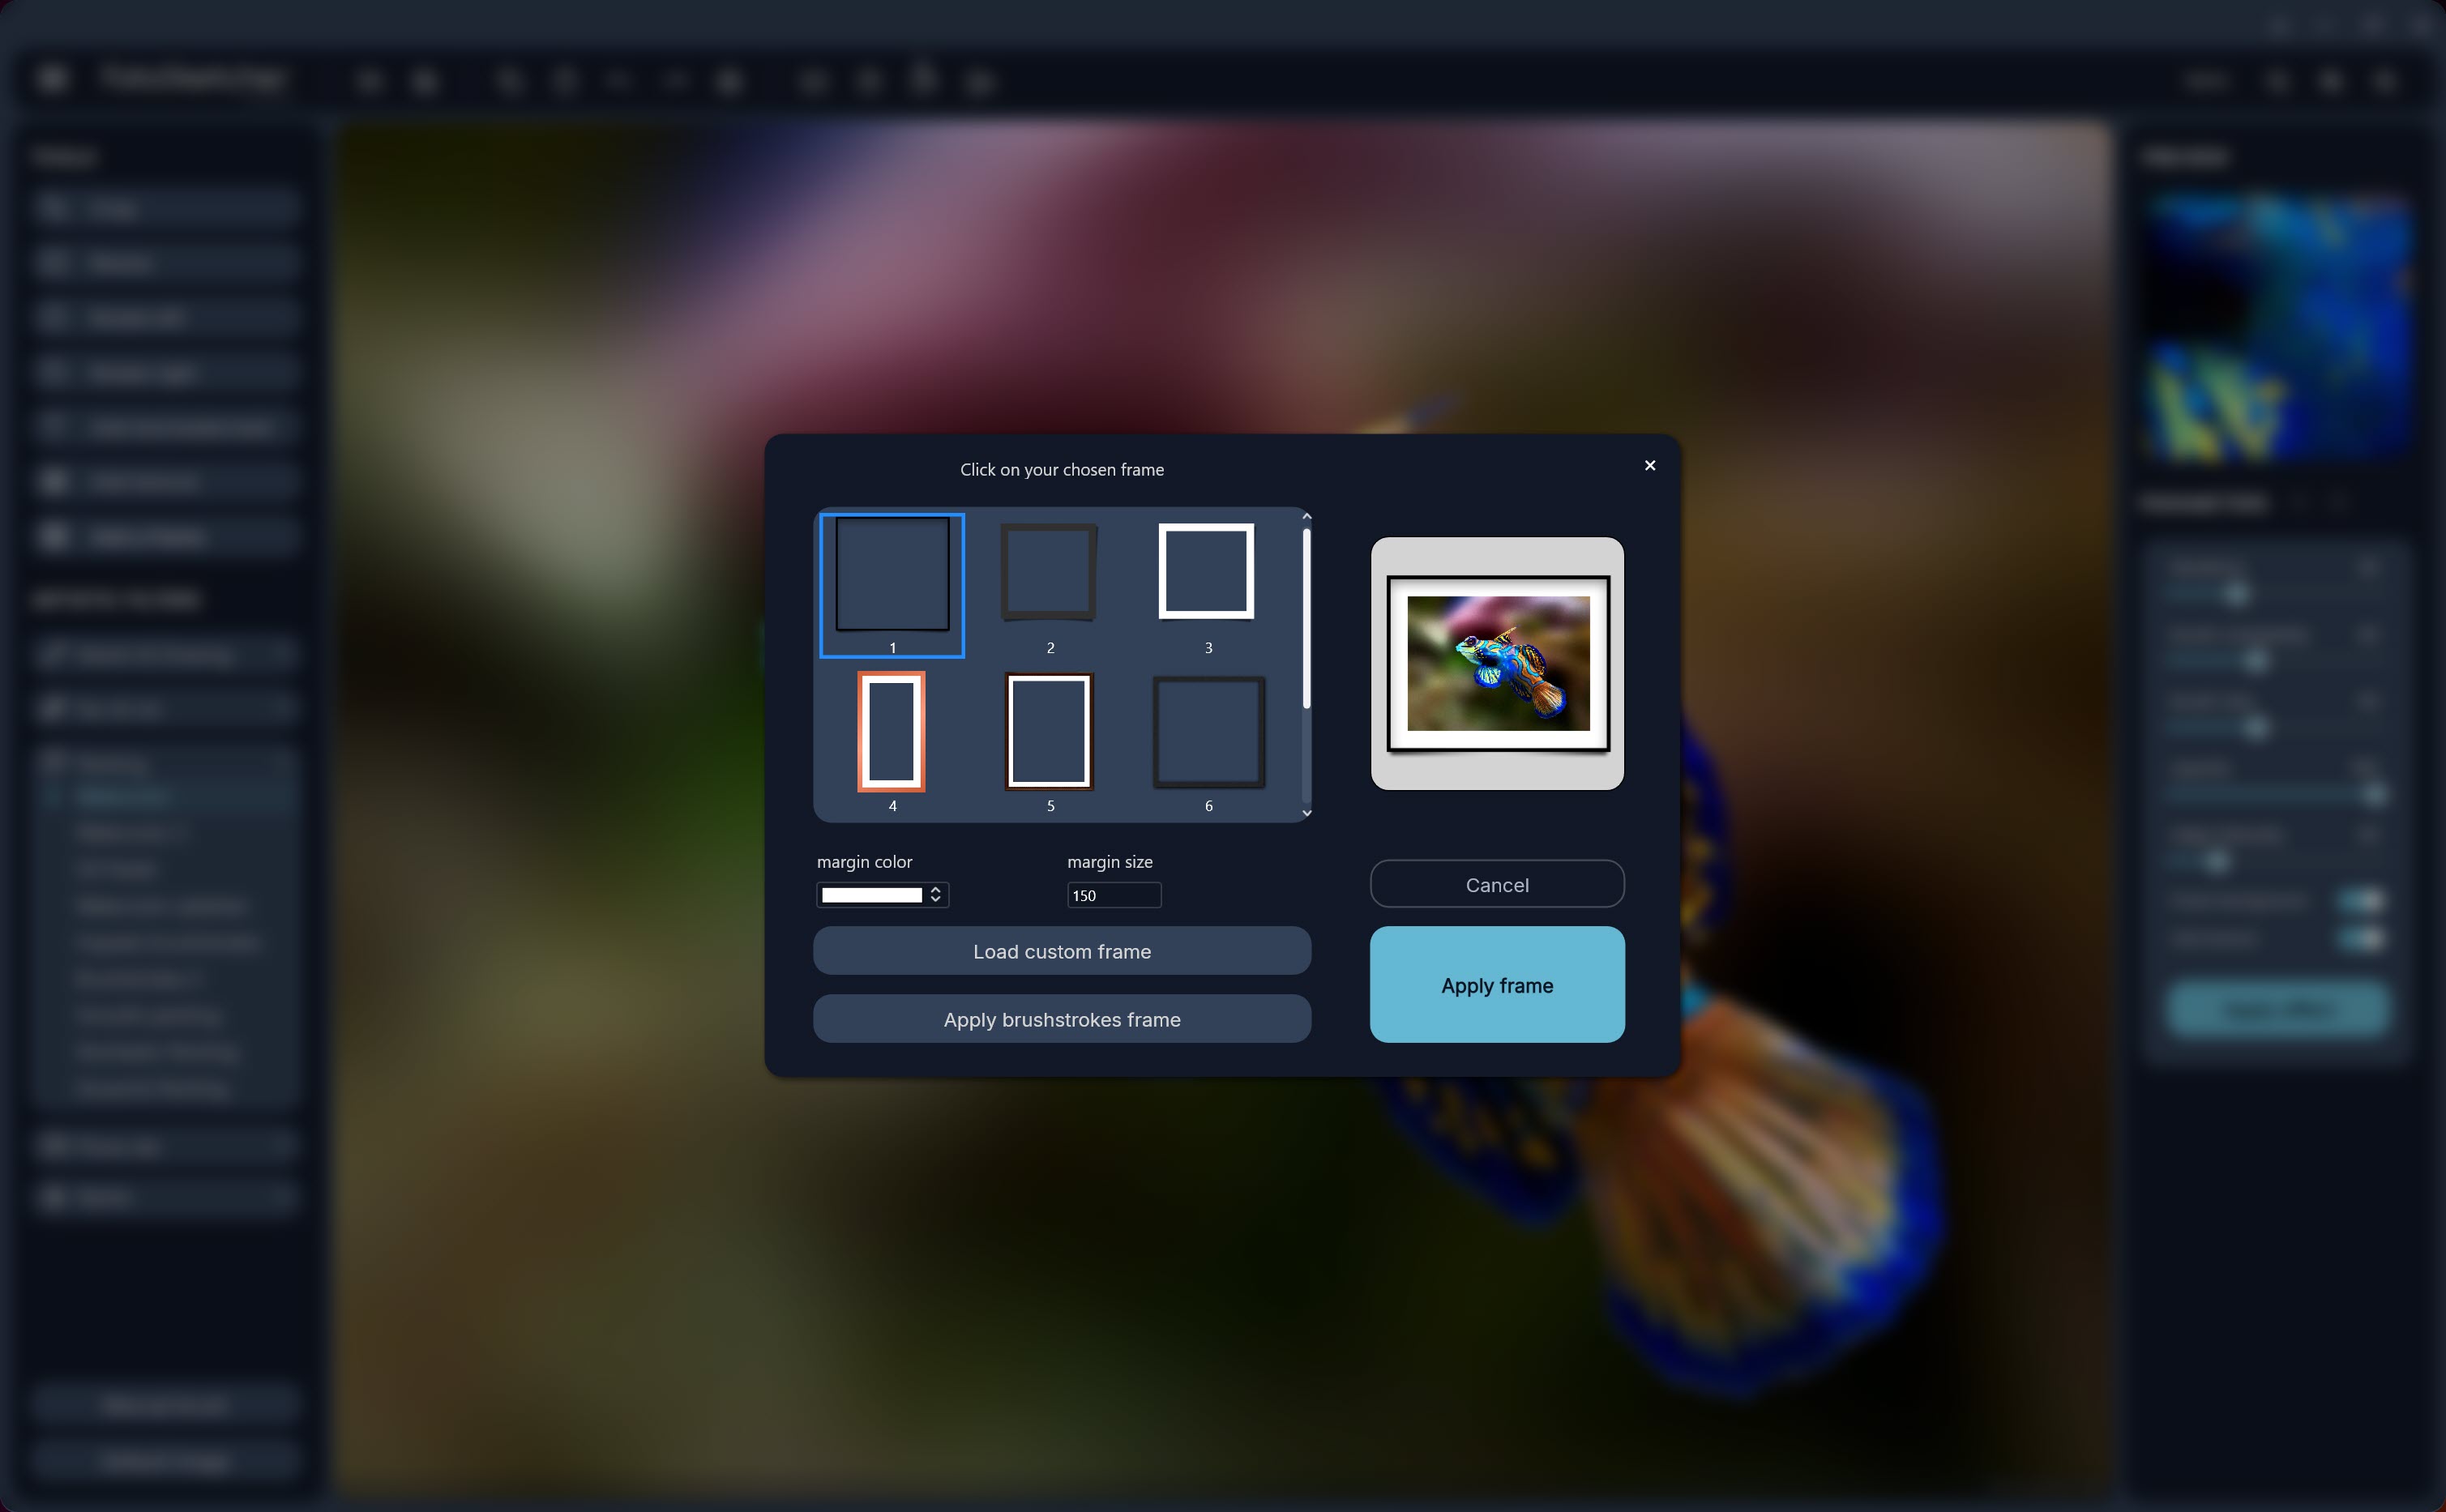
Frames are included and they are fine. What is missing is tiling and offsets. You get one watermark in one place, and if a repeating pattern across the whole frame is what you are after, a tool built purely for watermarking will do more.
Conclusion
FotoSketcher Studio suits two groups particularly well. Hobbyists who want a photograph to look hand-drawn without learning to draw will get a printable result in an afternoon, and anyone producing themed images in volume, be that prints, cards or client galleries, will find the scripting and batch side worth the setup time.
Anyone expecting the local control of a real editor should look elsewhere, because the brush is coarse and there are no layers to fall back on. Take FotoSketcher Studio for what it is, an effects renderer with unusually deep parameters and a scripting layer bolted on properly, and it holds up better than the pile of one-click filter apps it tends to get grouped with.
Pros & Cons
- Effects are grouped by medium and each one exposes real parameters rather than a single intensity slider
- The do-not-erase-background toggle lets one effect render on top of another in two steps
- Eighteen embedded LUTs plus support for your own .cube files
- The manual brush protects faces and focal points from the effect
- Scripts automate multi-step sequences and cover watermarking and folder-wide runs
- Auto-Enhance on a single keypress gives the painting renderers a much better source image
- The history gallery keeps every attempt, which suits an effect you have to try repeatedly
- Slider names describe algorithm parameters, not visible results, so learning them takes experimentation
- No layers, no masks, no blend modes
- Watercolour and the other painting effects take a while on high-resolution images
- The script language has no conditionals or variables
- The LUT list cannot be reordered or filtered
- Two renders of the same photo cannot be compared side by side
Frequently asked questions
No. Every effect is an algorithmic filter running on your own machine, with no model and no server involved, which is why the same photo and the same slider positions always produce the same output.
Yes. Batch mode handles one effect and one parameter set across a folder, and the Script Editor extends that to multi-step sequences including watermarks.
Crosshatch and the pencil styles hold facial detail better than the painting renderers do, and Cartoon at zero colour intensity gives clean outlines. Use the manual brush to keep eyes and mouth out of the effect.
Yes, the alpha channel survives both the effect and the export. WebP files open directly as well, alongside JPEG, PNG and BMP.
Yes, parameter files store your slider positions for reloading, and files written by older builds still load correctly rather than being rejected.
Because the renderers work from edges and tonal contrast rather than from subject recognition, so a change in lighting or focus shifts where the brushstrokes fall. Auto-Enhance first, then adjust the sliders per image.


