

Photomatix Pro
About Photomatix Pro
A camera cannot hold a bright window and a dark room in the same frame. Shoot a bracket, three or five exposures of the same scene, and the information exists across the set even if no single file contains it.
Photomatix Pro merges those frames into one high dynamic range file and then renders it back down to something a screen or a print can show.
That second step is where everything is decided, and it is also where the software’s reputation was made and damaged. The same program produces the crunchy, halo-ringed, faintly radioactive look that gave HDR a bad name, and results so restrained nobody would guess brackets were involved.
The difference is one dropdown.
Two families of rendering, and the choice that matters most
At the top of the adjustment window sits a switch between Tone Mapping and Exposure Fusion. Everything else follows from it.
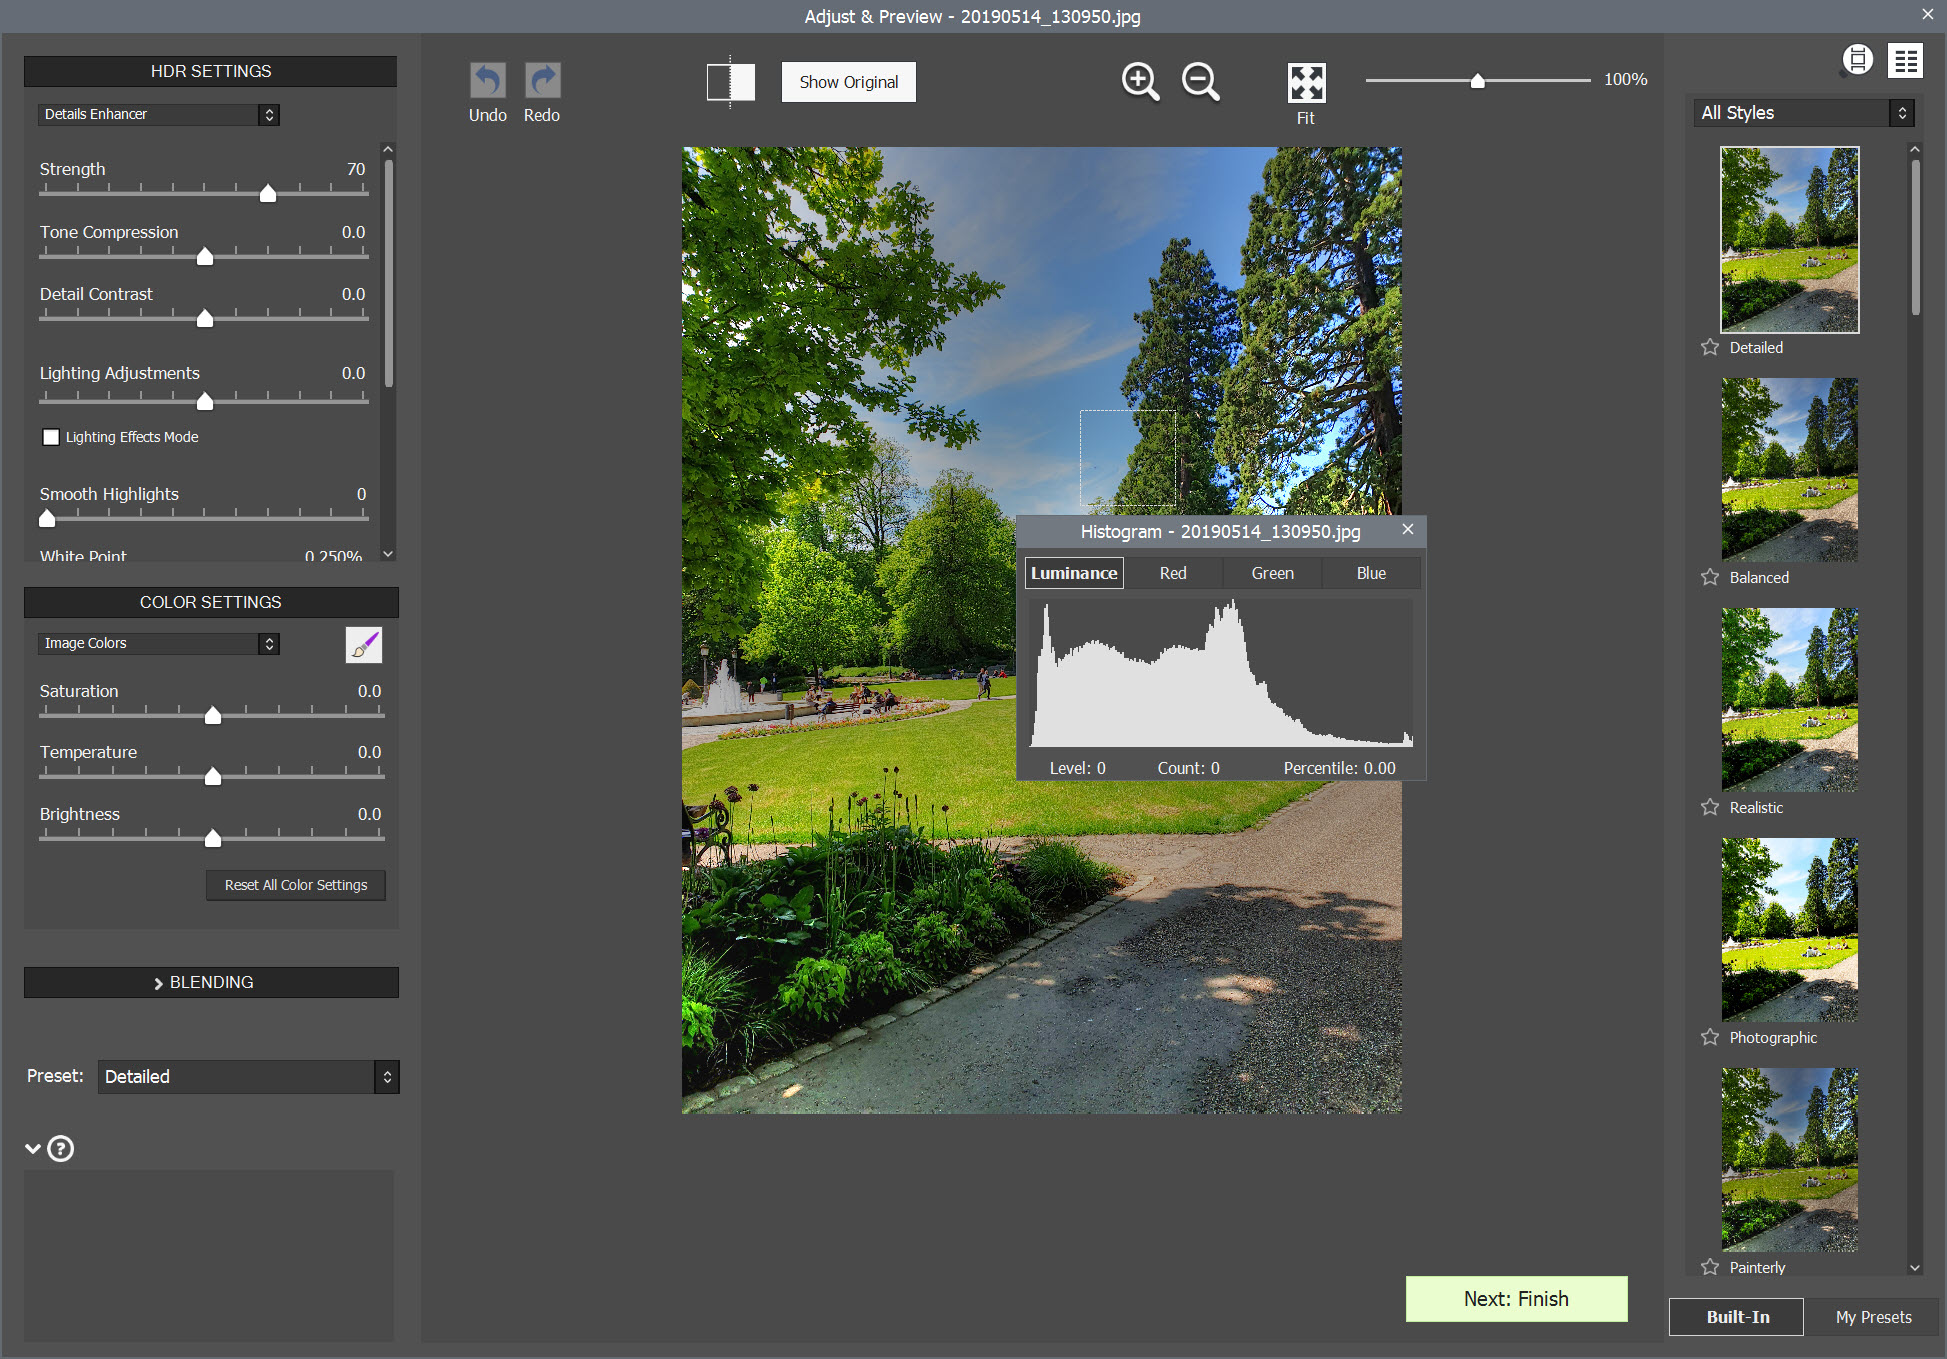
Tone Mapping works on the merged 32-bit file and offers three methods. Details Enhancer hands you the most control and the most extreme results. Contrast Optimizer aims for a realistic, halo-free rendering with local contrast that can be tuned region by region. Tone Compressor pulls both ends of the histogram toward the middle, producing something smooth and conservative.
Exposure Fusion blends the source frames directly rather than working from the merged file, and it is the honest answer for most photographs. Natural does what its name suggests, Intensive pushes harder, Real Estate is tuned for interiors where a window needs to hold detail without the room going flat, and a couple of automatic methods run with no controls at all.
There is also a two-image mode where you weight one exposure against another.
The Details Enhancer, and why HDR got its reputation
This one method in Photomatix Pro is responsible for most of the images people think of when they hear HDR. Push strength and detail contrast and you get halos around every roofline, grey skies, and shadow noise that looks like gravel. Used lightly it produces genuine local contrast that no single exposure could deliver.
The setting that rescues it is micro-smoothing, which specifically suppresses the noise the detail sliders raise while keeping the structure you were after. Raising it is almost always the correct response to a render that looks harsh, and it is the control most people never touch.
Sliders beyond that cover strength, tone compression, colour saturation, brightness, plus white and black clipping and a lighting effect, with advanced sections folded away underneath. A histogram and a loupe sit alongside the preview, and the loupe matters, because a fit-to-window preview lies about noise.
If the stylised look is what you actually want rather than something to avoid, a tool built specifically around that aesthetic gets there faster.
Alignment and deghosting
Brackets shot without a tripod do not line up, and Photomatix Pro compensates for horizontal and vertical shift, rotation, and even forward or backward movement, with separate algorithms for tripod and hand-held sets. On an ordinary outdoor bracket this works without intervention.
Movement inside the frame is the harder problem. Automatic deghosting handles leaves, water, passing traffic, with adjustable aggressiveness. When it smears something important, the Selective Deghosting tool is the answer. Draw a selection around the moving object, choose which of the source frames should supply that area, and the rest of the merge proceeds normally. Masks can be saved and reloaded, which matters when you are processing a series shot in the same conditions.
Complex motion remains manual work. A crowd, or branches moving differently in each frame, means several selections and one region that still looks softer.
Cleanup and finishing
Photomatix Pro runs noise reduction by default when the sources are RAW, aimed at the shadow areas where a weak sensor signal turns into visible grain once you start lifting detail. Chromatic aberration correction is separate and matters more here than usual, since colour fringing on high-contrast edges is what a bracket merge amplifies.
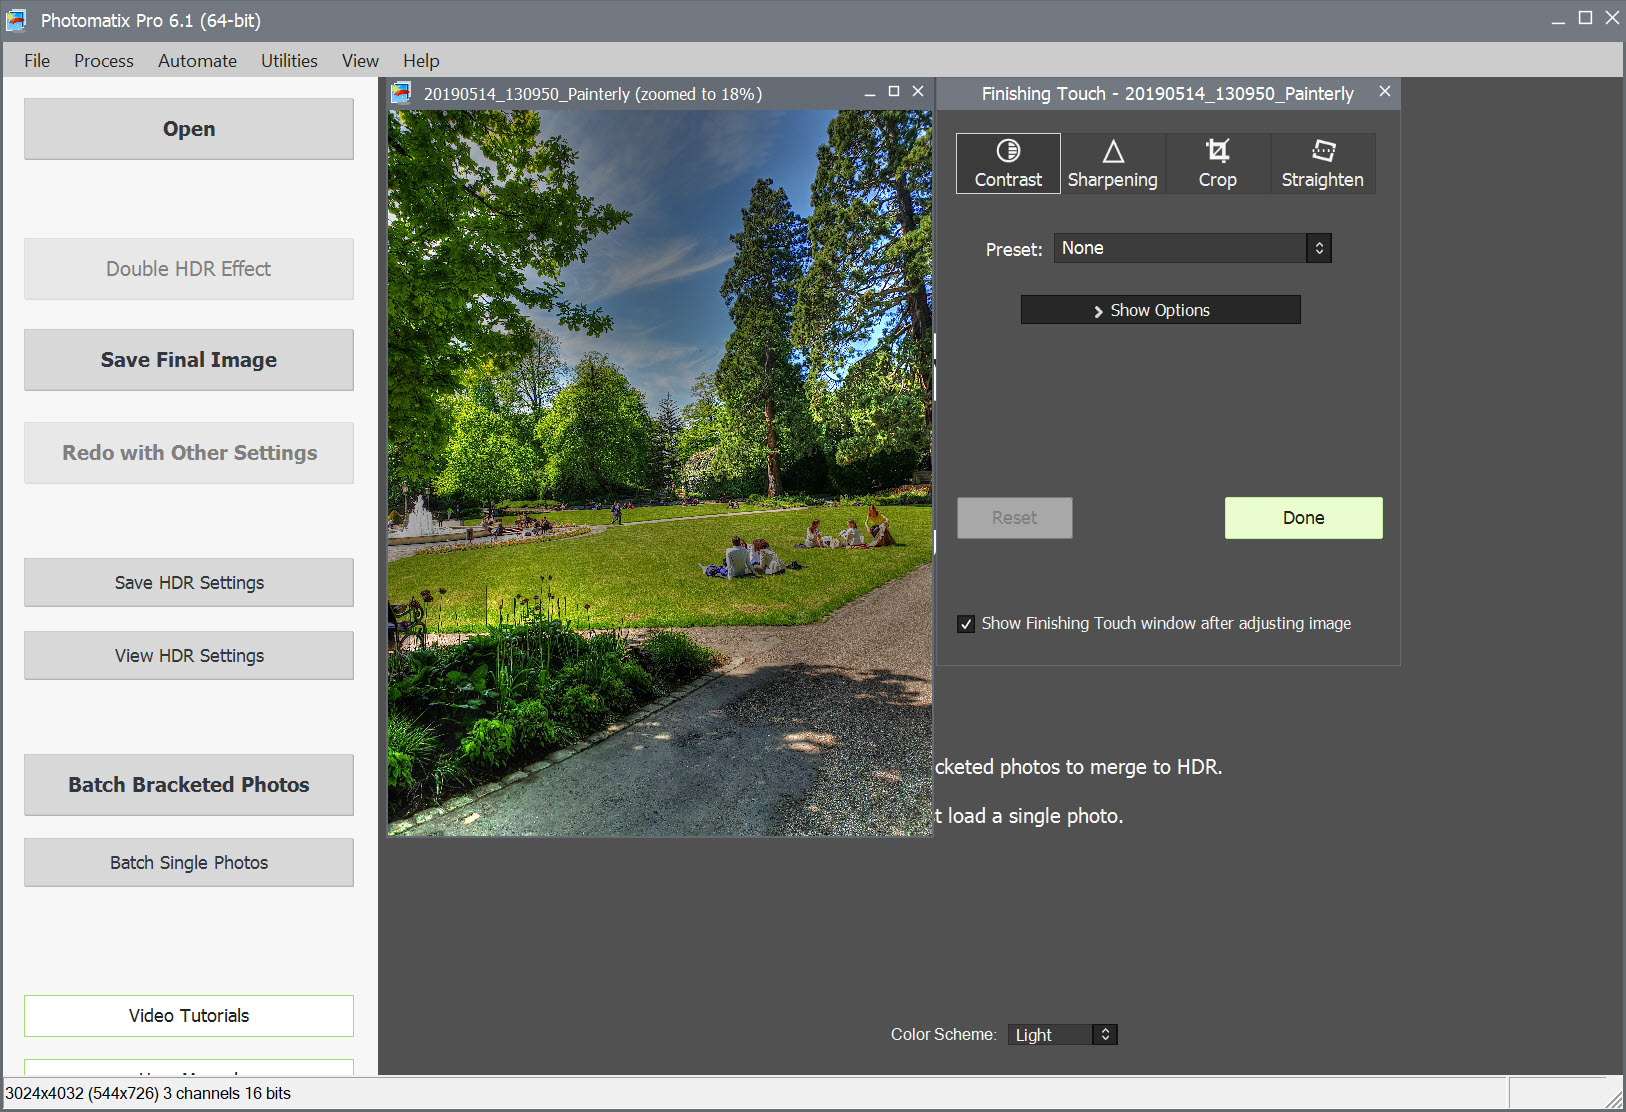
After the render, the Finishing Touch palette adds contrast, sharpening, saturation adjustments per colour, and cropping. A colour profile can be applied to the result. You can also keep the unprocessed 32-bit merge as its own file, sensible on a scene you might render differently later.
What you cannot do here is anything local. There are no layers, no masks, no brush. Save out a 16-bit TIFF and finish the dodging and burning somewhere built for it, and Affinity Photo handles that end of the job while also merging brackets itself if you would rather not switch programs at all.
Presets and getting through a shoot
Around forty presets ship with Photomatix Pro, displayed as thumbnails of your own image rather than as names, so choosing a starting point is looking rather than guessing. Your own settings can be saved as presets and presets made by other people can be imported.
Batch processing comes in two shapes. One takes folders of bracketed sets and pushes them through tone mapping or fusion. The other runs many single images through tone mapping. A batch can apply several different settings in the same run, so one pass produces three interpretations of every set to choose between later. Sifting those results is quicker in a viewer built for moving through folders fast than in the program itself.
easyHDR Pro covers similar ground with different rendering algorithms and is the closest direct alternative.
Conclusion
Photomatix Pro remains the specialist tool for a job most editors treat as a side feature. Interior and architectural photographers dealing with windows, anyone shooting high-contrast scenes on a schedule, and photographers who want six distinct renderings of the same bracket rather than one algorithm’s opinion will get more from it than from a merge command buried in a general editor.
Go in knowing that the easiest result to produce is the worst one. The Details Enhancer with its defaults pushed will hand you exactly the images that made people tired of HDR a while ago, and the restrained methods sitting next to it are where the value lives.
Learn which dropdown does what, keep micro-smoothing in mind, finish elsewhere, and it earns its place in a workflow rather than announcing itself in every frame.
Pros & Cons
- Six rendering methods across tone mapping and fusion cover natural through to surreal
- Contrast Optimizer produces realistic results without the halos the detail methods create
- Micro-smoothing directly counters the noise that detail enhancement introduces
- Alignment handles rotation and forward movement, not just horizontal shift
- Selective deghosting lets you nominate which source frame supplies a moving area
- Fusion works from a single RAW file when no bracket exists
- Batch runs can apply several different settings to every set in one pass
- The Details Enhancer makes overcooked results the easiest thing to produce
- No local adjustment at all, so layers and masking happen in another program
- Complex in-frame motion needs manual selections and still leaves softer regions
- The interface is functional rather than modern, and the workflow is strictly step-by-step
- Shadow noise still climbs on aggressive renders despite the noise reduction
Frequently asked questions
Exposure Fusion set to Natural, or Contrast Optimizer if you are working from the merged file. Both avoid the halos and grey skies that the Details Enhancer produces at higher settings.
Yes. Exposure Fusion splits one RAW into darker and lighter versions and blends them. The result is limited by what the file actually contains, but on a well-exposed RAW it recovers a useful amount.
Automatic deghosting handles most of it with adjustable strength. For anything it smears, the selective tool lets you draw around the object and pick which source frame supplies that region, and the mask can be saved for a series.
Because detail enhancement amplifies whatever grain was already there. Raise micro-smoothing, which exists for exactly that, and consider a less aggressive method before reaching for external noise reduction.
No. It merges and renders, then hands you contrast, sharpening, saturation, cropping. Anything local, meaning dodging, burning, cloning or masking, needs a proper editor afterwards.


