

rEASYze
About rEASYze
rEASYze is a batch image resizer with a watermark tool bolted on. You drop a pile of photos into it, set a width in pixels or a percentage, type a line of text for the corner, pick an output format and click Save All. Every image in the pile comes out resized and stamped the same way. That is the whole product, and the name (say it aloud, it is “resize”) tells you as much. It runs from a folder without an installer and states plainly that it sends nothing anywhere.
It occupies the ground between the resize dialog buried inside a viewer such as IrfanView and a full converter with dozens of chained actions. The pitch is that you should never have to hunt through a menu to do the one job people most often need done to a folder of photos, and for that job it holds up. Anything past it and the seams show quickly.
Loading and resizing a batch
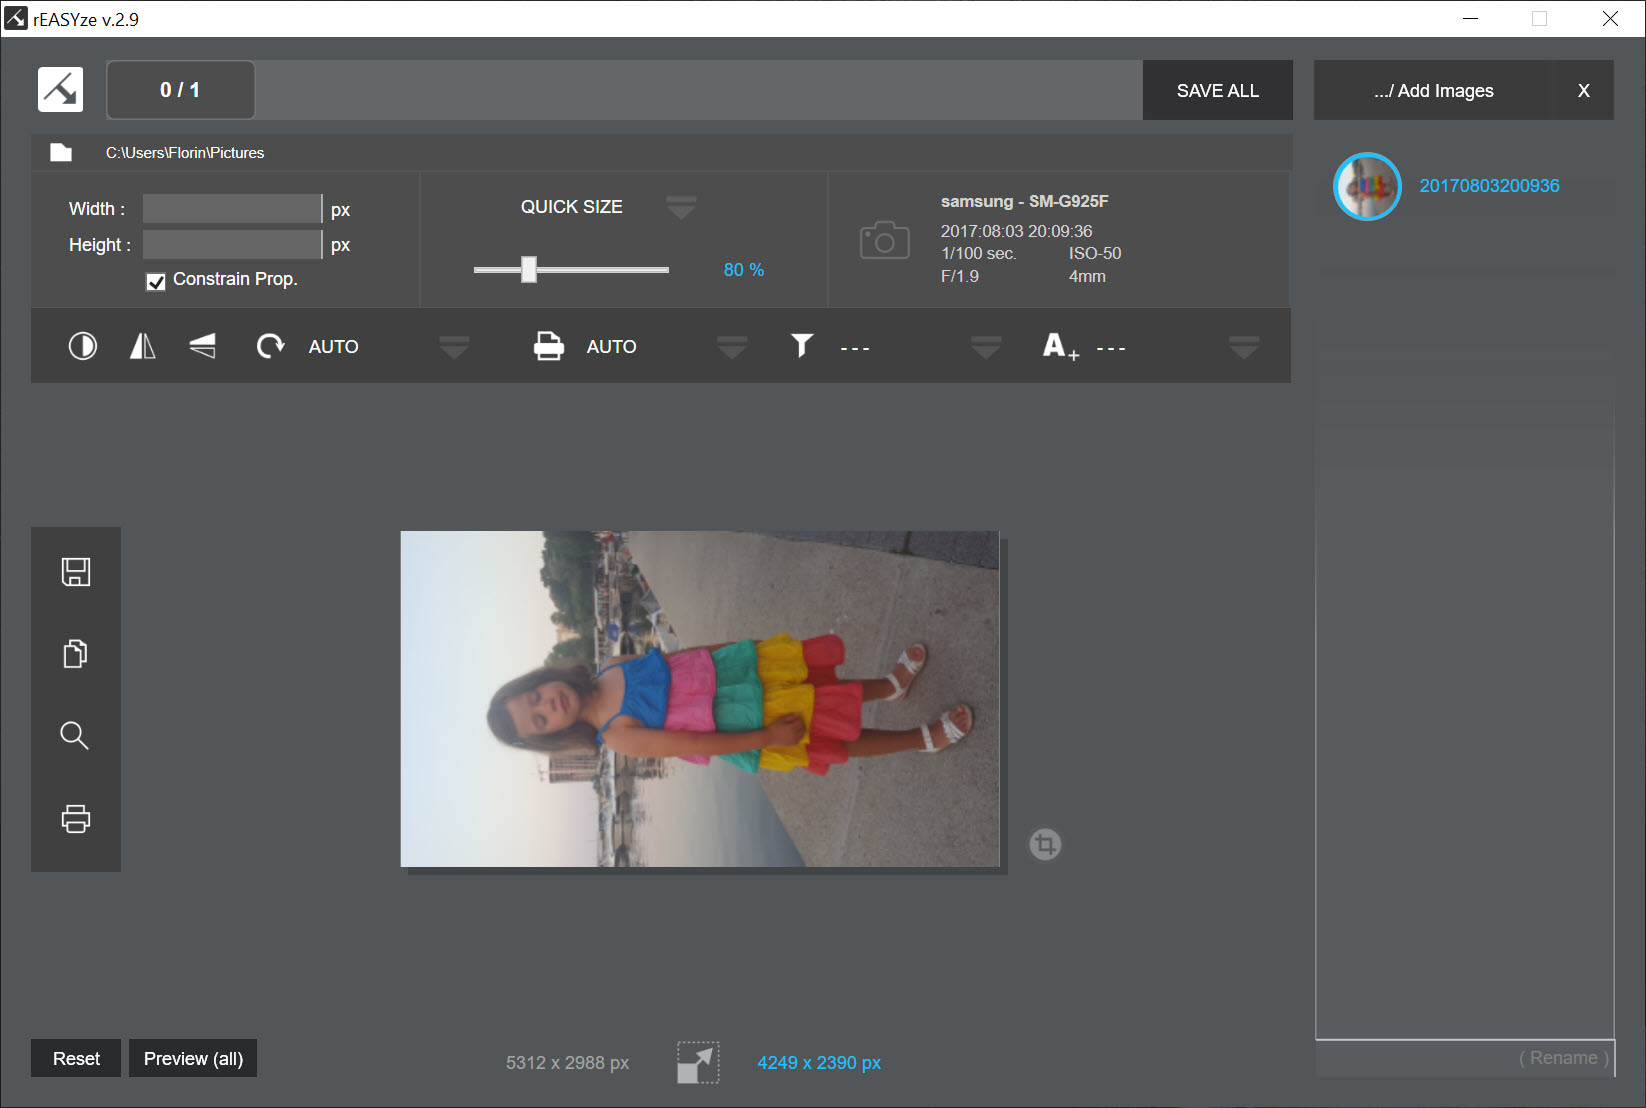
The window is dark, with a large preview in the middle, a thumbnail strip down the right edge and the controls in the top left. Images come in through the Add Images button or by dragging files onto the strip. There is no option to load a folder, and a Reset button in the corner clears the whole list.
Select any thumbnail in rEASYze and a small pane above the preview shows its EXIF details, the camera, the date, aperture, ISO and shutter speed. Resizing is done either with the quick size slider or by typing a width and height into the two fields, with proportions kept by default and the resulting pixel dimensions printed along the bottom. Whatever size you set applies to every loaded image, and so does every other edit described below. rEASYze has no per-image settings, and it never pretends to.
Colour, rotation, filters, crop
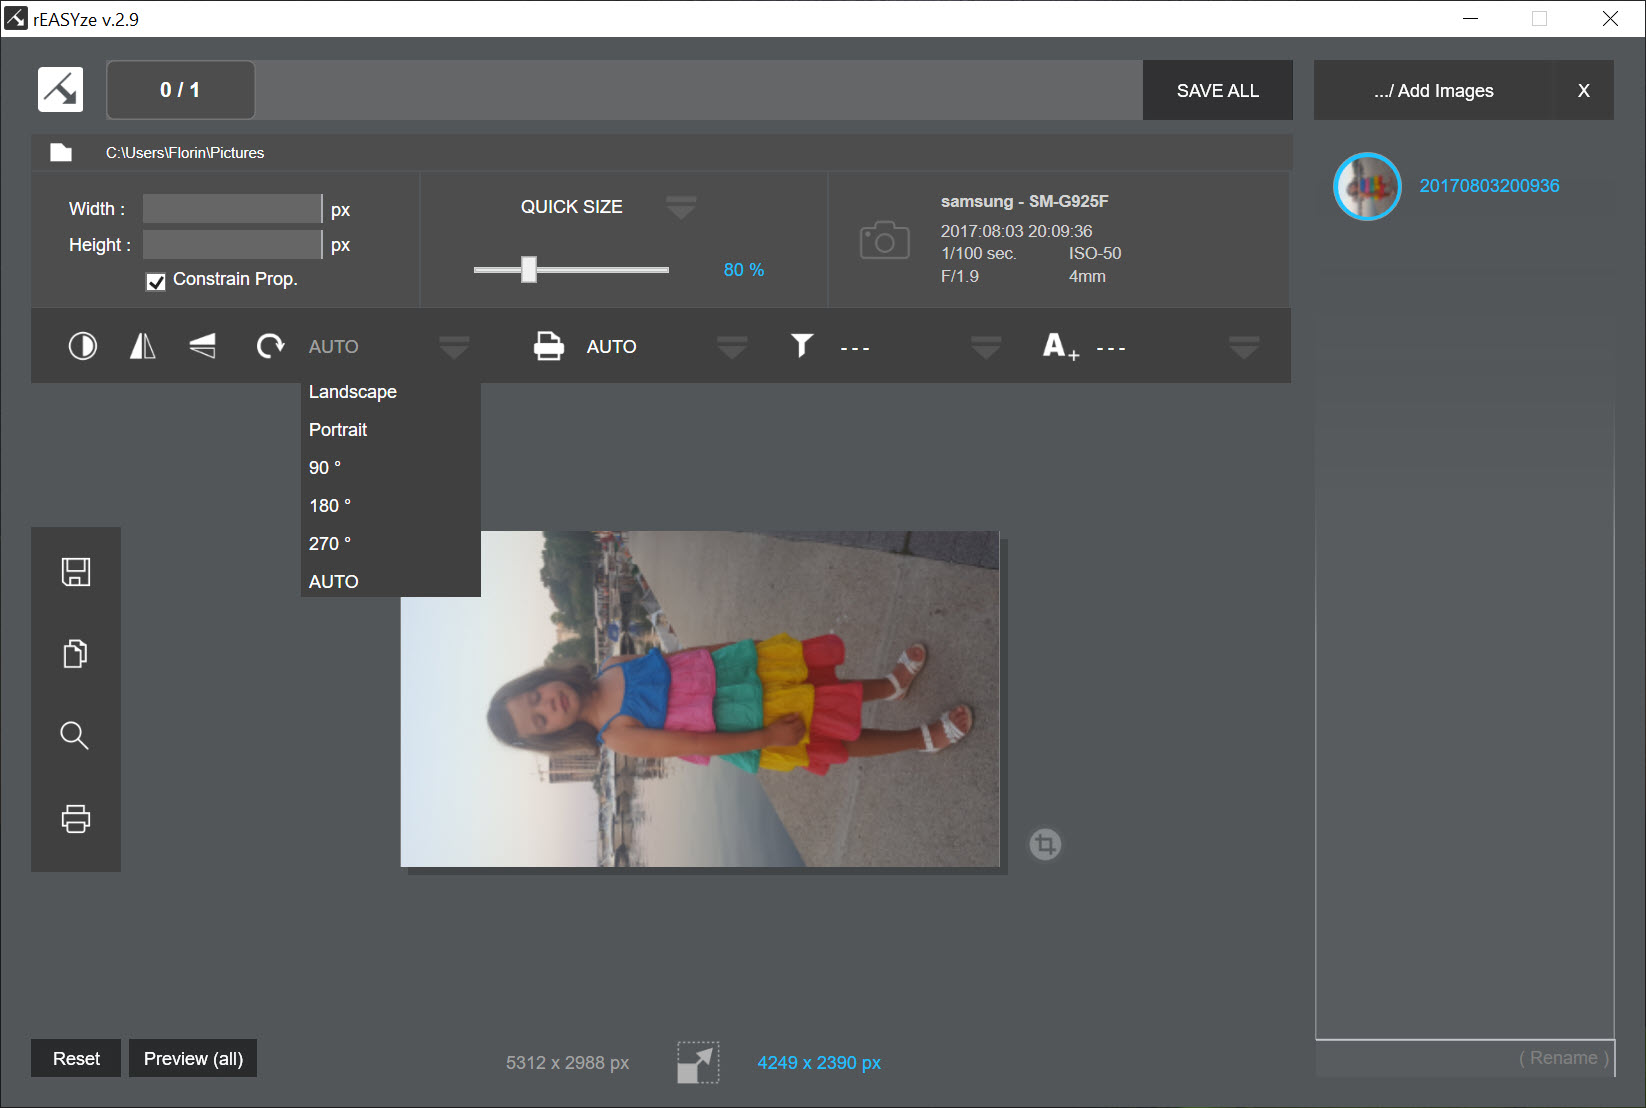
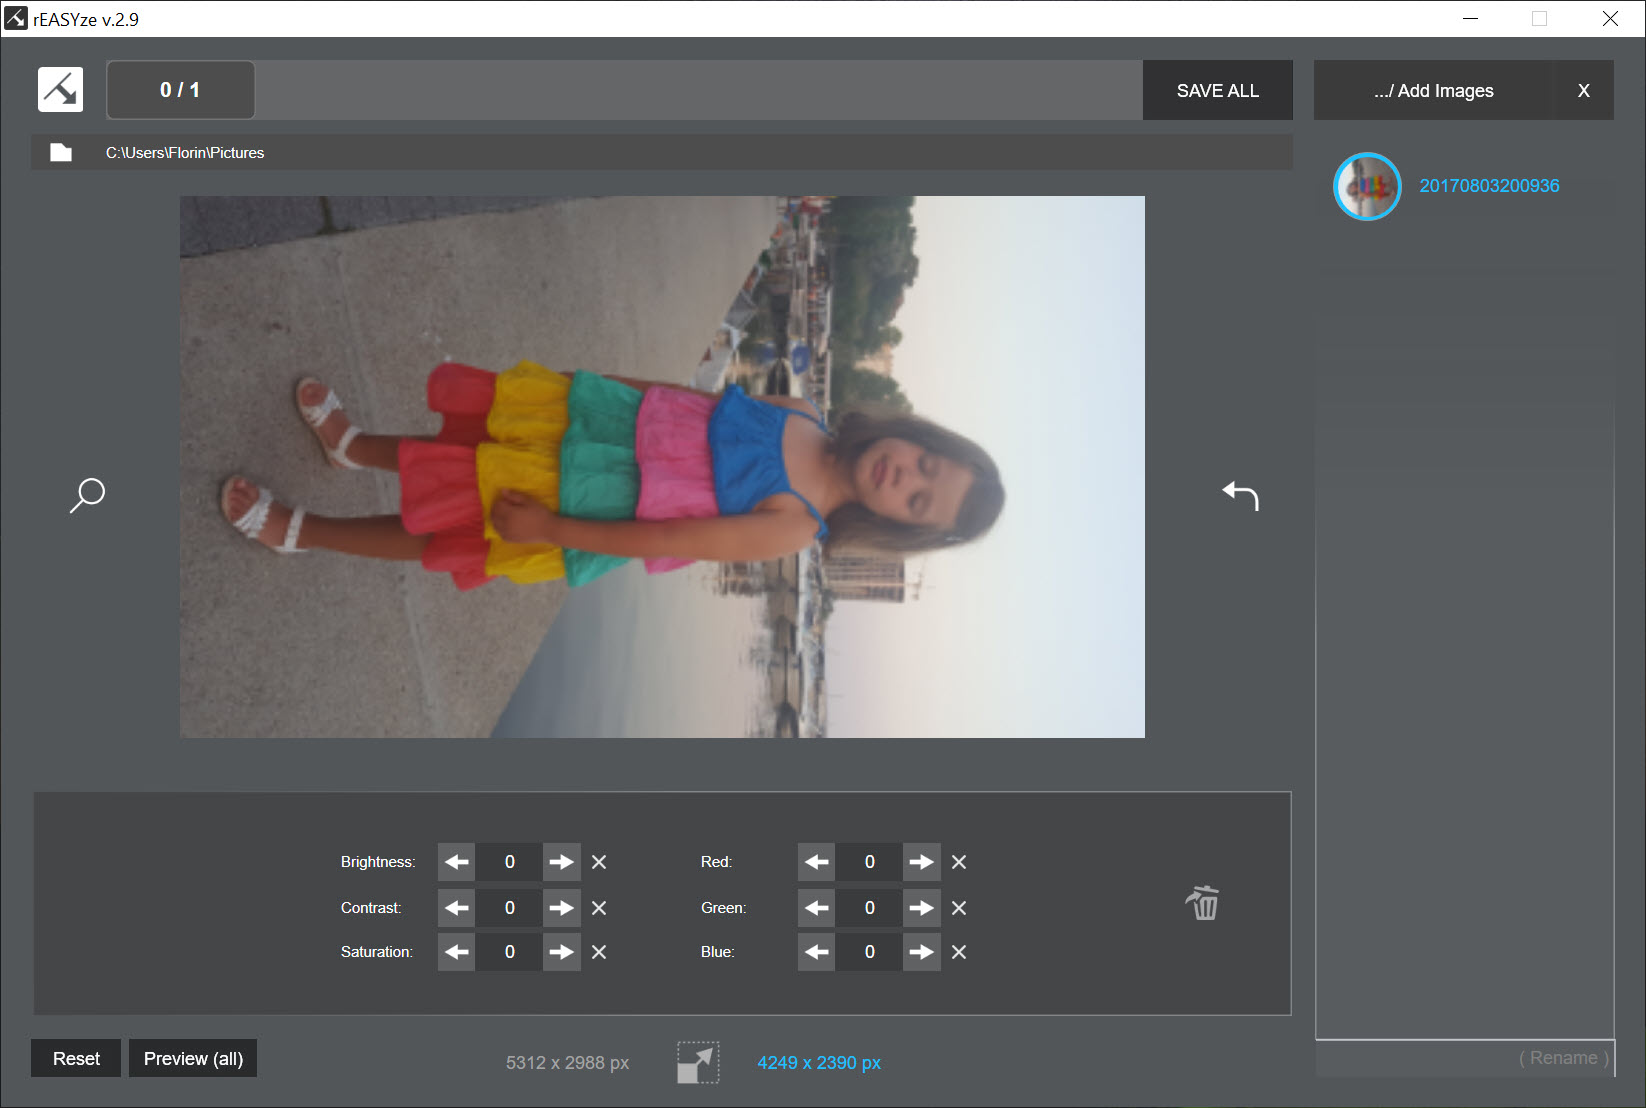
Below the size fields sit a colour panel with sliders for brightness, contrast and saturation plus one per colour channel, then horizontal and vertical flip buttons and a rotate button. A filter menu offers Gray, Sepia, Black and White, Invert, Negative and Polaroid, which is the complete list and is aimed at social feeds rather than photographers. Hover over the preview and drag the handles that appear on its border to crop, the one operation where doing it on a whole batch at once is more likely to hurt than help, since every photo gets the same rectangle.
The output format in rEASYze is chosen from JPG, PNG, GIF, TIF or BMP, without a quality slider for JPG. If the point of the exercise is shrinking files for a website rather than shrinking pixels, run the results through a compressor that shows the size before and after, because this tool has nothing to say about file size.
The watermark tool
Click one of the pencil icons that appear over the preview, or the A+ button on the toolbar, and the watermark editor opens. Type the text, choose a font and colour, set size and opacity, add an optional background colour behind the letters, and place the mark in one of the four corners or dead centre. A grid option tiles the text across the whole image for the people who really do not want it reused, and an image watermark can be dropped in instead of text. Settings can be saved and reloaded, so a shop’s standard stamp is a one-time setup.
What you cannot do is drag the mark to an arbitrary spot or tilt it, and the five fixed positions are the tool’s most obvious limit. For the usual case, a small line of text bottom right on fifty holiday photos, it is exactly enough.
Renaming and export
At the foot of the thumbnail strip is a text field. Type a base name there and the export writes name_1, name_2 and so on in list order. That is the entire renaming feature, with no date tokens, no original-name retention and no padding control, so a renamer that builds names from patterns is still the right tool when the names matter. Save All asks for an output folder and a Start Export button runs the batch, with a Preview button beside it that opens the current image in a pop-up, not full screen.
Conclusion
rEASYze is for the person who has a folder of photos to post and needs them smaller and stamped before lunch. Small shop owners, bloggers and anyone who sells things online will find the watermark presets and one-screen workflow save real time.
It is not for retouching, for per-image adjustments or for anyone who needs the watermark placed precisely. It does one repetitive job without ceremony, and that is a fair description of a good utility.
Pros & Cons
- Resize, watermark, convert a whole batch from one screen
- Watermark presets with opacity, a background colour and a tiled option
- EXIF summary shown for each loaded photo
- Runs from a folder and sends no data anywhere
- No load-folder option, files must be added or dragged in
- Watermark limited to four corners and centre, with no free placement
- Renaming adds only an incremental number
- No JPG quality setting on export
Frequently asked questions
Not directly. Use the Add Images button and select all the files in the folder, or drag them from a file window onto the thumbnail strip. Subfolders have to be added separately.
Every image in the list. All edits, including crop as well as filters and colour changes, are batch-wide, so remove any photo you want left alone before exporting.
No. The choices are the four corners, the centre or a tiled grid across the whole image. Free placement and rotation are not available.


