

fSpy
About fSpy
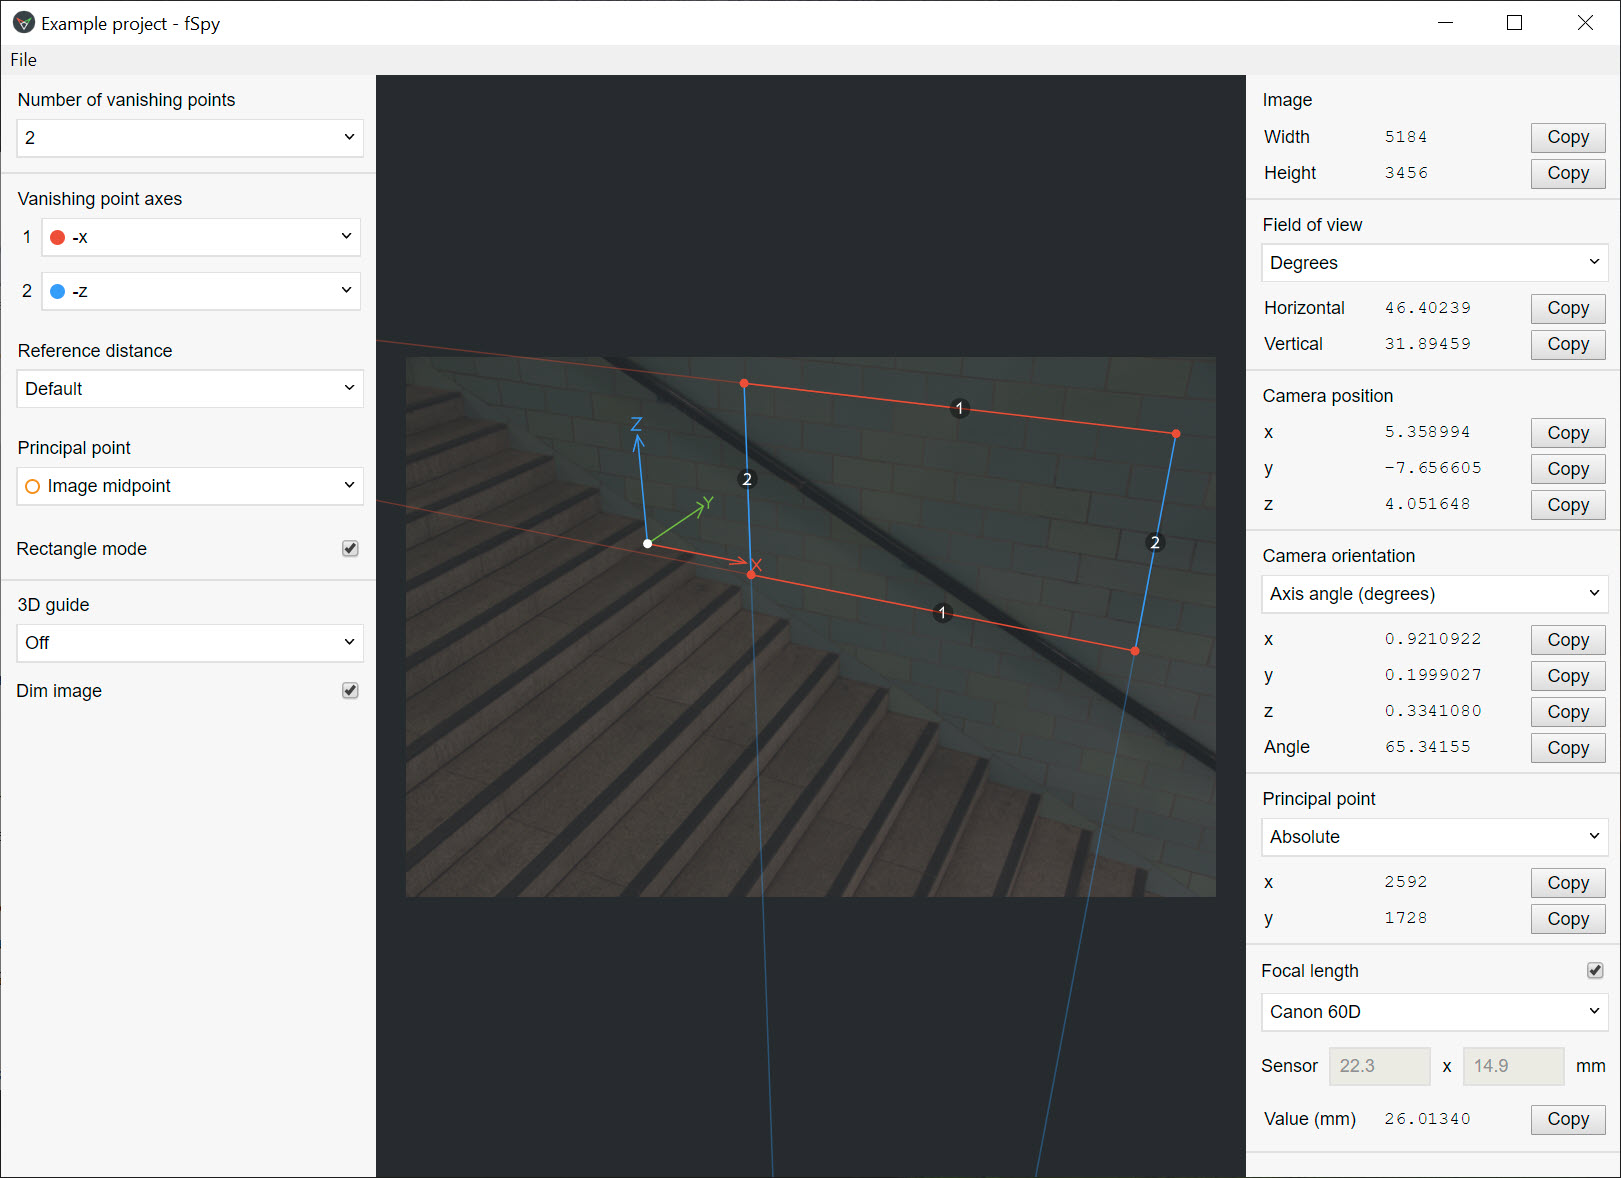
fSpy works out where a camera was standing when a photo was taken. Load a still image, drag a few line segments along edges that run parallel in the real world, and the application computes the focal length, the orientation and the position of the camera in 3D space. Import the result into a 3D program and the virtual camera lines up with the photo, so a model placed in the scene sits in the picture at exactly the right angle and scale.
3D artists used to do this by nudging a camera around for an hour until the grid looked roughly right. Typical uses are dropping a building into a site photo, compositing product shots onto a background, and modelling a room from reference.
Vanishing points and the control lines
Everything in fSpy rests on vanishing points. Parallel edges in the real world converge in a photo, and where they meet is the vanishing point for that direction. You place two line segments along each set of parallel edges, the corner of a wall and a floor line, a row of tiles, the sides of a road, and the intersection appears as thin guide lines stretching off towards it.
With two vanishing points for perpendicular directions, the application has what it needs to solve the camera. Three vanishing points add the principal point, which matters for images that have been cropped off centre or shot with lens shift. One vanishing point works too, as long as you supply extra information such as the focal length or a horizon line.
Accuracy depends almost entirely on where the lines go. Place them far apart, along the longest straight edges in the image, and the solution is solid. Place them close together on a short edge and small errors in position become large errors in the camera.
Axes, reference distance and scale
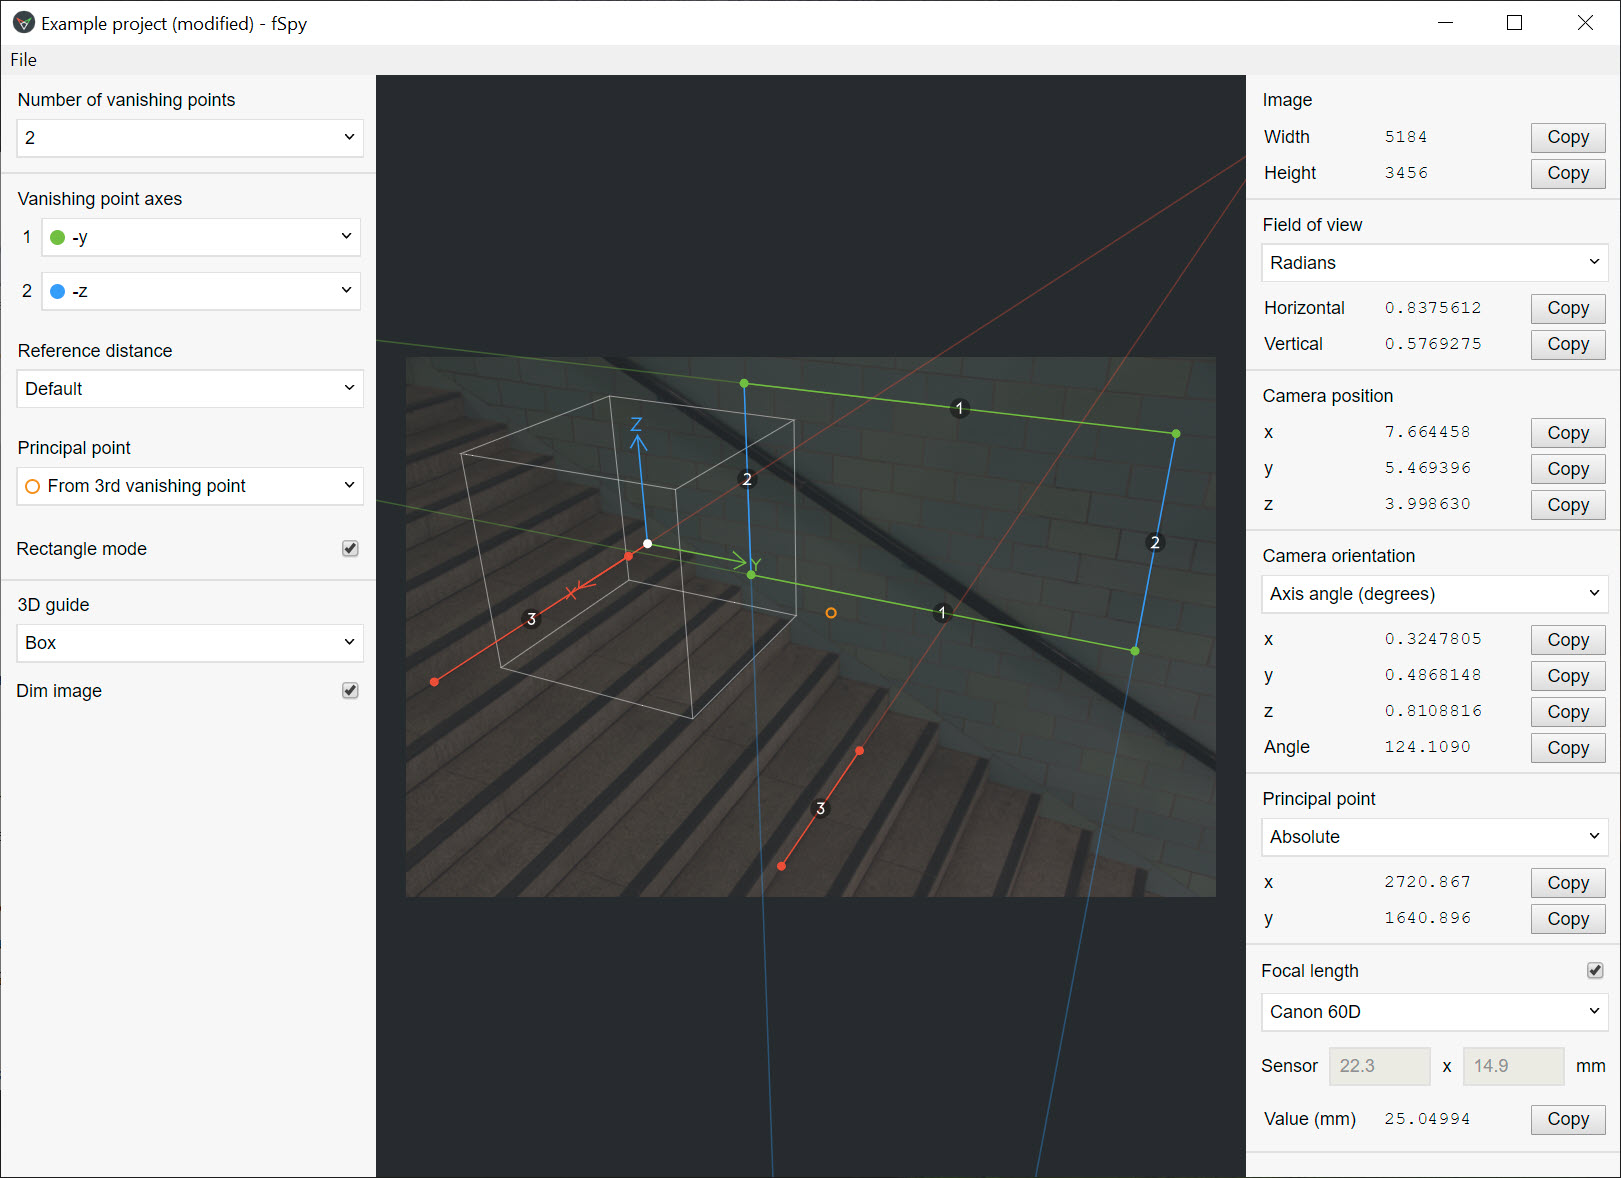
In fSpy each vanishing point is assigned to an axis, so you tell the application which direction is up and which runs along the floor. Get this wrong and the camera comes out lying on its side, which is the first thing to check when a result looks absurd.
Scale comes from a reference distance. Pick a feature whose real size you know, such as a door, drag the reference handles along it, and type the measurement. Architectural users can later carry that scale into a parametric CAD modeller. From then on the scene has real-world units rather than arbitrary ones. The origin can be moved to any point in the image, which is where the 3D grid will sit once imported. One known quirk is that the origin and the start of the reference distance are tied together, so a reference measured off the floor places the origin off the floor too.
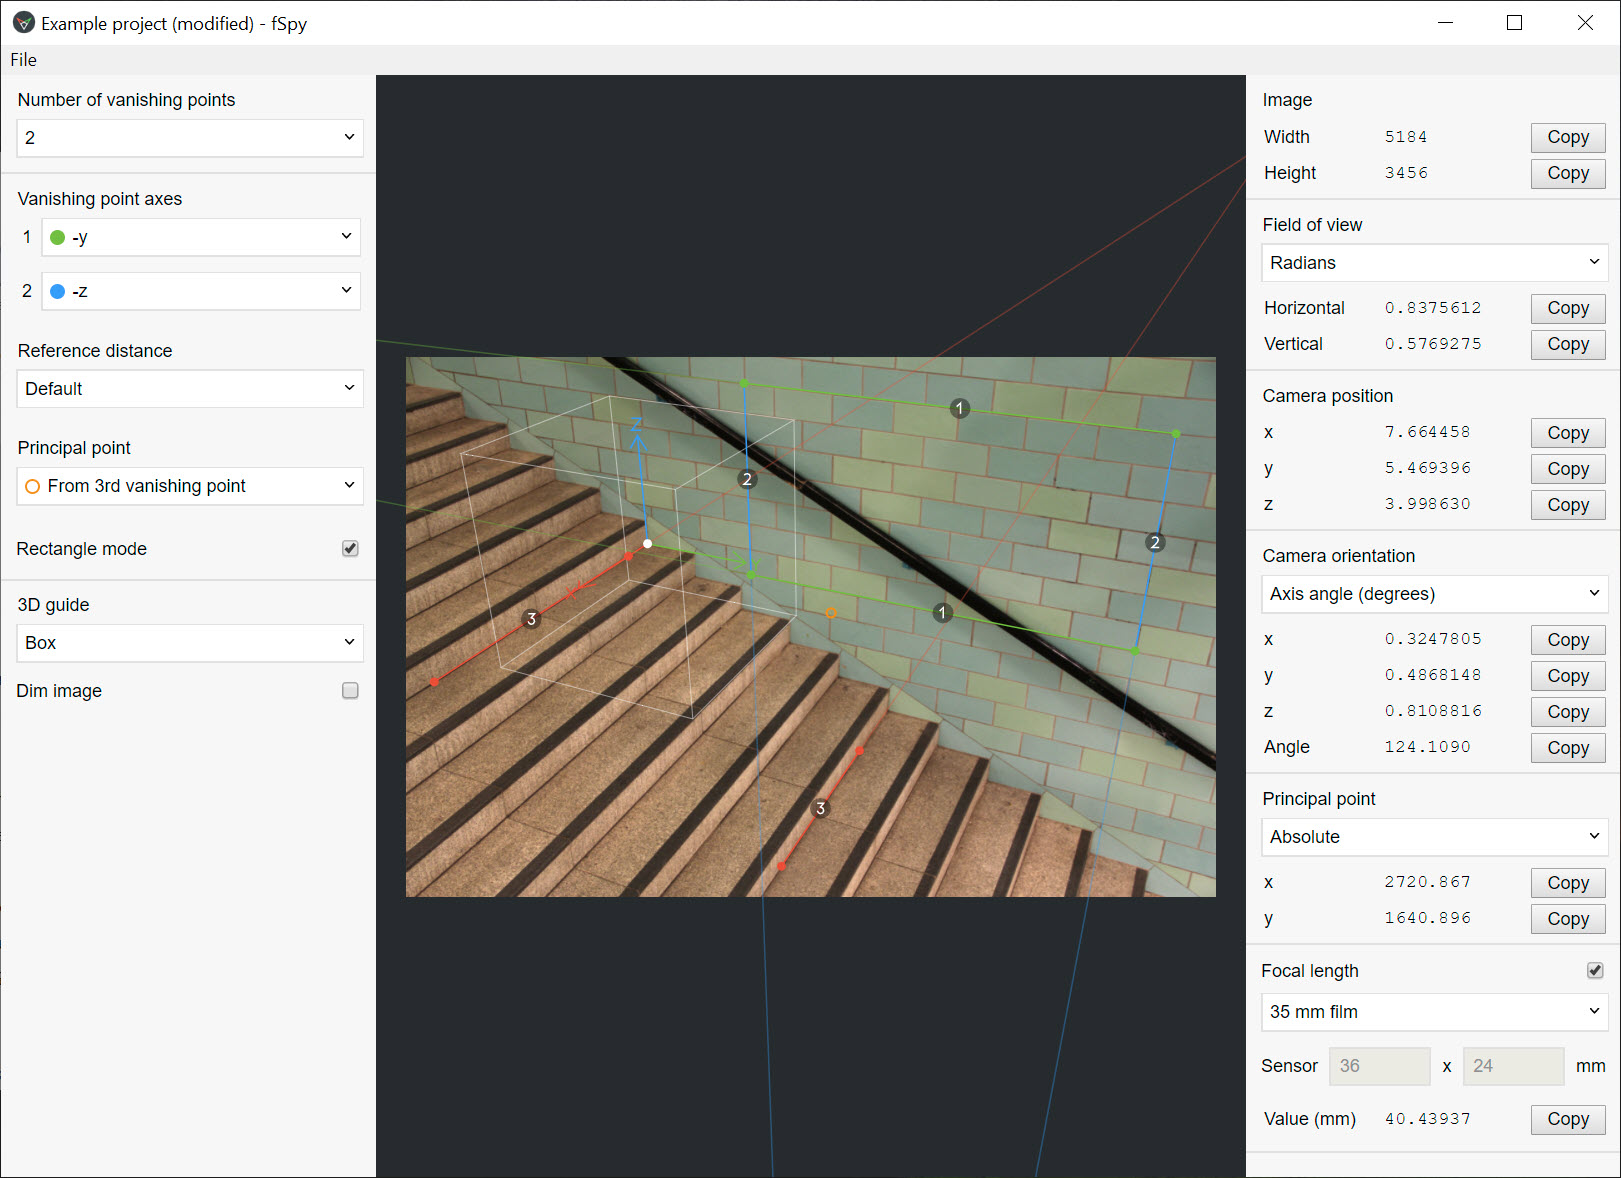
A 3D guide overlay draws a box or grid in the solved space, the quick sanity check before exporting.
Getting the camera into Blender
Saving produces a small project file holding the image and the solved camera. The companion importer add-on reads it into Blender, creating a camera with the computed focal length, rotation and position, and setting the photo as its background. Scene units follow whatever was chosen in the application. Clipping distances sometimes need a tweak after import, and that is the only cleanup.
A JSON export exists for other 3D programs, holding the camera matrix and parameters for anyone willing to write the few lines to read it.
Where it struggles
Two-point perspective is the awkward case for fSpy. With both vanishing points on the horizon, the focal length depends on the principal point, and on an off-centre crop the default midpoint guess is wrong. The fix is to move the principal point by hand and test the result in the 3D program, which turns into a loop of adjustments. Lens distortion is the other problem.
The maths assumes a pinhole camera, so wide-angle shots with barrel distortion bend the straight edges you need, and those need correcting in a RAW photo editor with lens profiles before they come here.
Conclusion
fSpy is for 3D artists who composite models into photographs or build scenes from reference images, and for whom a mismatched camera is the difference between a render that convinces and one that looks pasted on. Architectural visualisers and product artists will use it weekly and wonder how they managed without it.
It is a single-purpose tool and makes no attempt to be anything else. Feed it a clean, undistorted image with long straight edges and it solves the camera in a minute. Feed it a cropped wide-angle phone shot and you will spend longer tuning than you saved.
Pros & Cons
- Computes focal length, orientation and position from a single still image
- 3D guide overlay confirms the solve before export
- Reference distance gives the solved scene real-world units
- Importer add-on builds the camera and background in one step
- Works with one, two or three vanishing points
- Two-point perspective on cropped images needs manual principal point tuning
- Assumes an undistorted lens, so wide shots need correcting first
- Origin is tied to the start of the reference distance
- Direct import exists for only one 3D program
Frequently asked questions
The camera's focal length, its rotation and its position in 3D space, based on vanishing points you mark on the image.
Two perpendicular ones are the usual case. Three also solve the principal point for off-centre crops, and one works if you supply the focal length or other extra information.
The axes assigned to the vanishing points are wrong. Swap the axis for each vanishing point until the 3D guide overlay sits correctly.
Only once the distortion is removed. Straight lines must be straight in the image, so correct barrel distortion before marking vanishing points.


