

ShareX
About ShareX
ShareX captures screenshots in more ways than any competing tool, and that’s just the entry point. Region capture, full screen, active window, scrolling capture for long pages, GIF recording, full screen recording with audio, freehand capture, ten or twelve other modes if you count the variants.
Each one is bound to a hotkey you choose, and each one feeds into a customizable post-capture pipeline that can annotate, watermark, save, copy, and upload the result automatically before you’ve even let go of the mouse.
That post-capture automation is what separates this from every other screenshot tool. Most screenshot apps stop at “save the image somewhere”.
This one chains together actions: take the shot, open it in the built-in editor, blur sensitive areas, watermark with your logo, save to a specific folder, upload to Imgur, copy the resulting URL to your clipboard, and announce it in Discord. All of that runs from a single keypress once configured.
Capture methods that go far past the basics
The capture catalog goes well beyond what built-in screenshot tools offer. Region capture lets you draw a rectangle around exactly the portion you want, with precise pixel snapping if you need it. Window capture identifies open applications and lets you grab one cleanly without manual cropping.
Active window does the same for whatever’s focused, useful for hotkey-driven captures during workflows. Full screen handles multi-monitor setups, capturing everything across all displays or just the monitor your cursor is on.
The more interesting modes are the ones nobody else offers. Scrolling capture handles long web pages or documents by automatically scrolling and stitching the result into a single tall image. The implementation isn’t perfect (very long pages occasionally produce alignment artifacts), but for most scrolling capture needs it works cleanly. Auto capture sits in the background taking screenshots at intervals you specify, useful for documenting processes that take time to complete.
Free-hand capture lets you draw an irregular shape and capture only what’s inside it, useful for grabbing specific UI elements without the rectangular framing of standard region capture.
Polygon mode does the same with straight-line segments instead of free drawing. Last region recapture grabs the same area as your previous capture, which sounds trivial but matters substantially when you’re documenting changes to a specific part of the screen across multiple iterations.
The workflow pipeline that nobody else has
The feature that genuinely separates ShareX from everything else is the after-capture and after-upload task system. Each capture can trigger a customizable sequence of actions before you ever see the result. Standard sequences include opening the image in the built-in editor for annotation, applying watermarks or effects, saving to a specific folder with a templated filename, copying the image to clipboard, and uploading to a destination of your choice. Each step is optional, configurable, and chainable.
The after-upload tasks extend the same model to whatever happens once your file is hosted. Copy the resulting URL to clipboard, shorten it through a URL shortener service, generate a QR code, send it through email, post it to a configured Discord webhook. The chain runs automatically once configured, which means a typical workflow goes: press hotkey, draw region, the image is annotated, watermarked, saved locally, uploaded to Imgur, the URL is shortened, the short URL is copied to your clipboard, and a notification toast tells you the whole thing is done. Total elapsed time from hotkey to clipboard URL: usually under three seconds.
Custom workflows can be saved as named profiles and bound to different hotkeys.
Most users end up with two or three: a “quick share” workflow for casual screenshots that uploads to a public host, a “documentation” workflow for work captures that saves locally with annotations, and maybe a “private” workflow that uses a self-hosted server for sensitive material. Switching between workflows happens through hotkey choice rather than through menu navigation.
Built-in image editor and annotation tools
The image editor opens as part of the after-capture flow whenever you want, and it covers the annotation needs most users actually have. Arrows, text labels, rectangles, circles, blur tools for hiding sensitive content, highlighter, freehand drawing, step numbering for tutorials. The toolset is more substantial than the editing built into Snipping Tool but lighter than full graphics applications like Photoshop or GIMP.
The blur tool deserves specific mention because it’s the feature most users reach for repeatedly. Click the blur button, drag over the area you want obscured, and the pixel content is blurred to whatever level you specify.
Useful for hiding email addresses, license keys, or other sensitive content visible in screenshots before you share them. Some other tools require external editing for this kind of redaction; here it’s part of the standard capture flow.
Step numbering generates sequential numbered circles for tutorial screenshots, automatically incrementing as you click. For users documenting software workflows or writing tutorials, this single feature saves substantial time compared to manually placing numbered indicators in external editors.
Combined with the standard arrow and text tools, the editor handles most documentation needs without ever needing to open another application.
80+ upload destinations and how they work
The supported destination list runs to 80+ services and counting. Image hosts: Imgur, Flickr, ImageShack. Cloud storage: Dropbox, Google Drive, OneDrive, Box, MEGA, Amazon S3. File sharing: WeTransfer, Mediafire, GoFile. Code paste: Pastebin, GitHub Gist, Hastebin. URL shorteners: Bit.ly, TinyURL, is.gd, plus dozens more for various regional services. Custom FTP, SFTP, and FTPS for self-hosted setups.
Each destination has its own configuration panel for credentials, default folders, link format preferences, and various other parameters. Once configured, destinations can be selected per-capture or set as defaults for specific workflows. The OAuth-based services (Google Drive, Dropbox, etc.) handle authentication through standard browser flows, with the application storing tokens locally rather than passwords.
For users with self-hosted servers, the custom FTP/SFTP support handles the practical case of running your own file server. Set up the server credentials once, configure the URL pattern that maps uploaded files to public URLs, and the workflow uploads files to your server with the same simplicity as uploading to Imgur. This is the route most users take when they grow uncomfortable trusting external services with their captures.
OCR, color picker, and other bundled utilities
Beyond capture and upload, ShareX includes a collection of utilities that would normally require separate applications. OCR (optical character recognition) extracts text from any image, useful for grabbing text from screenshots when you can’t select it directly. The accuracy depends on image quality and font, but for typical screenshots of text-heavy UI elements it works well.
The color picker captures the exact RGB and hex values of any pixel on screen, useful for designers matching colors across applications or developers checking what color a specific UI element actually uses. The screen ruler measures pixel distances on screen, useful for design work and UI development.
The magnifier provides a zoomed view of the cursor area, useful for precision work or for users with vision needs.
Image effects can be applied to captures automatically as part of the workflow. Watermarks with custom positioning and opacity. Borders, shadows, rounded corners. Color adjustments, sharpening, blur.
Resize and crop operations with templates. None of these are individually impressive, but having them all available within the capture-and-share flow means you don’t have to round-trip through external editors for routine effects.
Custom uploaders for self-hosted infrastructure
For users with specific needs that the built-in destinations don’t cover, the custom uploader system lets you define your own upload destinations through configuration files. Specify the upload URL, the form fields, the response parsing logic, and you can integrate the application with essentially any service that accepts HTTP file uploads. The community has built configurations for hundreds of services beyond what ships with the application by default.
This extensibility is part of why ShareX has stayed dominant in its niche. Whatever obscure service or self-hosted setup you want to integrate with, somebody has probably already published a custom uploader configuration for it. Self-hosted alternatives like Lychee, Chevereto, or PicSur all have community-maintained configurations available, as do various enterprise document management systems and corporate file servers.
For teams running their own infrastructure, custom uploaders handle the case where IT requirements forbid using public image hosts but the team still needs the speed of automated capture-and-share workflows.
Configure the custom uploader once for your internal server, distribute the configuration file to team members, and everyone gets the same one-keypress workflow with screenshots landing on company-controlled infrastructure.
Screen recording with FFmpeg backend
Screen recording in ShareX uses FFmpeg as the backend, which means the codec support, frame rate flexibility, and quality options match what FFmpeg itself can do. Standard configurations record video as MP4 with H.264 video and AAC audio, which works for most use cases. Advanced users can configure custom encoding parameters, bitrates, and codecs for specific needs.
Audio recording works through standard system audio capture, with options for recording the system audio (whatever is playing through speakers), microphone input, or both mixed together.
The mixing is handled at recording time rather than requiring post-production audio work. For users creating tutorial videos, the simultaneous capture of system audio and microphone narration matches what dedicated screen recording tools like OBS Studio offer, without the additional complexity of those applications.
GIF recording produces animated GIFs from a screen region, useful for documentation, bug reports, and tutorials where a short animation communicates more than a still image. The file sizes are larger than equivalent video formats, but GIFs play in essentially every context where you might paste them (web browsers, chat applications, documentation systems) without requiring video player support.
Considerations and limitations
The interface is dense. Years of accumulated features have produced a configuration system with depth that intimidates new users. The default settings work well for basic capture and clipboard copy, but accessing the workflow features that make the application genuinely powerful requires investment in learning the configuration system. Most users report a learning curve of a few hours to become productive with the advanced features.
Some specific upload destinations occasionally break when the underlying services change their APIs. The maintainers update the code in response, but there’s typically a period after major API changes where specific destinations don’t work until a new release ships. This affects only specific destinations rather than the application overall.
Memory usage is moderate during normal operation, but the screen recording feature can consume substantial RAM during long recordings, particularly at high resolutions or frame rates. Users with constrained systems should test recording with their typical settings before relying on the application for important sessions.
The configuration is granular enough that backing up your settings becomes a real concern. Custom workflows, configured destinations, hotkey assignments, and various other personalizations represent meaningful investment, and losing them through a system reinstall or migration is genuinely painful. The application includes export and import functionality for settings, but actively using it requires remembering to do so.
Conclusion
For users who capture and share screenshots regularly, ShareX has no real competition in the free tier. The combination of capture methods, automated workflows, upload destinations, and bundled utilities like OCR and screen recording covers what would normally take three or four separate applications, and the GPL license means there’s no subscription to evaluate or commercial constraint to work around.
The reasonable concern is the learning curve. Users who just want to grab occasional screenshots and paste them into emails will find this software’s depth unnecessary, with simpler tools like Snipping Tool or Greenshot handling that scenario more comfortably.
But for anyone whose work involves documentation, support, content creation, software development, or any other field that produces frequent screenshots, the time spent configuring workflows pays back across thousands of captures over the years.
Pros & Cons
- More capture methods than any competing tool, including scrolling, GIF, and freehand modes
- After-capture and after-upload task chains automate complete workflows from hotkey to shared URL
- 80+ built-in upload destinations covering image hosts, cloud storage, file sharing, and URL shorteners
- Built-in image editor with blur tool, step numbering, arrows, text, and other annotation tools
- OCR, color picker, screen ruler, and magnifier included as bundled utilities
- Custom uploader system supports any HTTP-based service through configuration
- FFmpeg-backed screen recording with audio support and configurable encoding
- Active development on GitHub with regular feature additions and bug fixes
- Open source under GPL license
- Configuration depth produces a meaningful learning curve for new users
- Some upload destinations occasionally break temporarily when underlying APIs change
- Screen recording can consume substantial RAM at high resolutions
- Interface design is dense and feature-heavy rather than minimalist
- Backing up custom configurations requires deliberate effort to avoid losing personalization
Frequently asked questions
This software is a screen capture, screen recording, and file sharing application that combines dozens of capture modes with automated post-capture workflows and 80+ upload destinations. It handles screenshots, GIF recording, full screen video recording with audio, OCR, color picking, and various other tasks that would normally require separate applications.
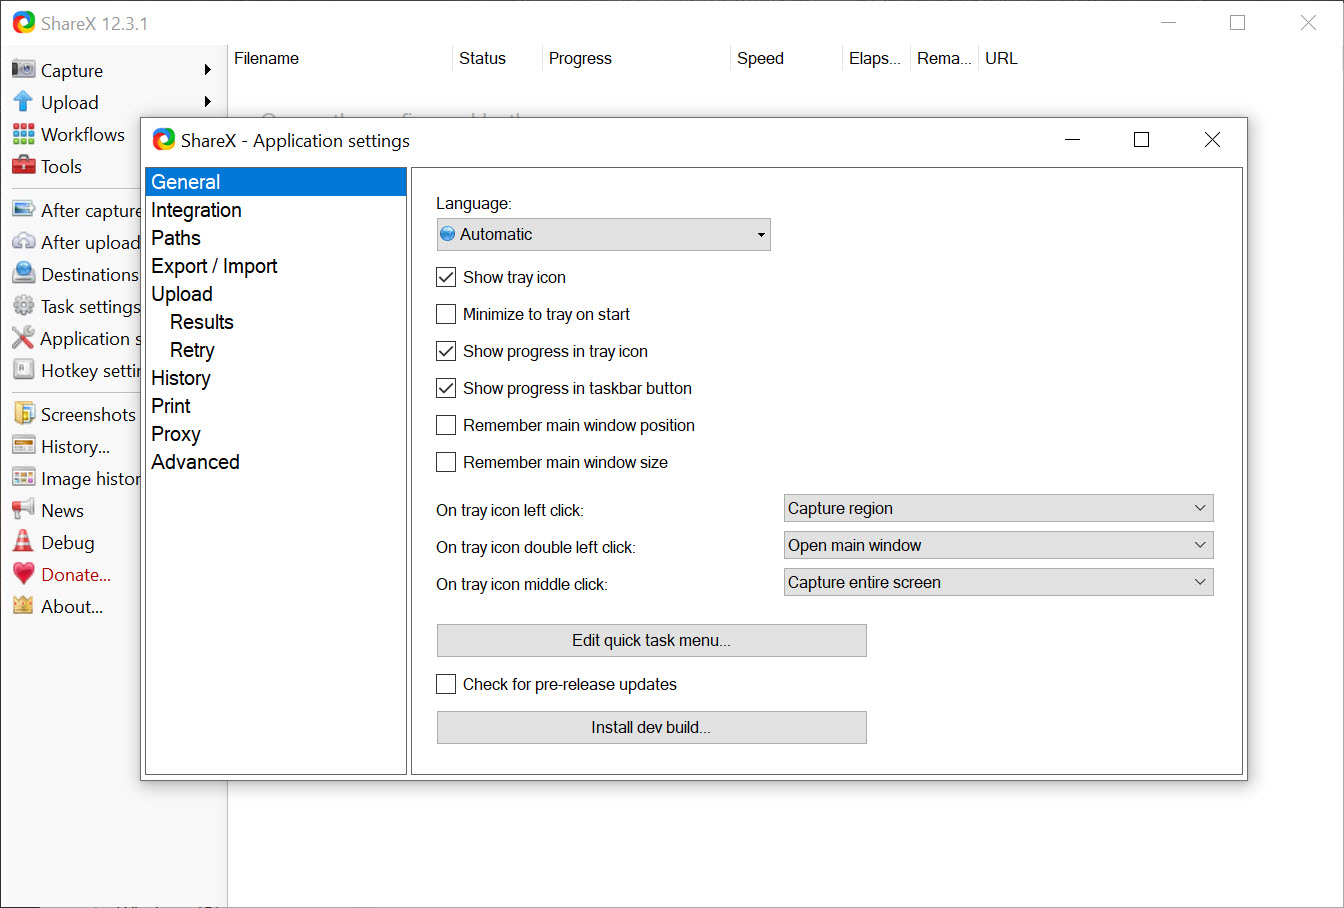
By default, screenshots save to the Documents folder under a ShareX subfolder, organized by year and month. The save location is configurable through the application settings, with options for custom folder paths, filename templates with date variables, and per-workflow save destinations.
Yes, screen recording can capture system audio (whatever is playing through speakers), microphone input, or both mixed together. The audio mixing happens at recording time rather than requiring post-production work, with the recorded video file containing the combined audio track.
Yes, full screen recording with FFmpeg backend is built in. Recordings produce standard MP4 files with H.264 video and AAC audio by default. Advanced users can configure custom codecs, bitrates, and frame rates for specific needs. GIF recording is also available as a separate mode for short animations.
Yes, automatic upload is part of the after-capture task system. Configure your preferred upload destination once and every capture can be uploaded automatically as part of the workflow. The resulting URL gets copied to your clipboard, ready to paste anywhere you need to share the screenshot.
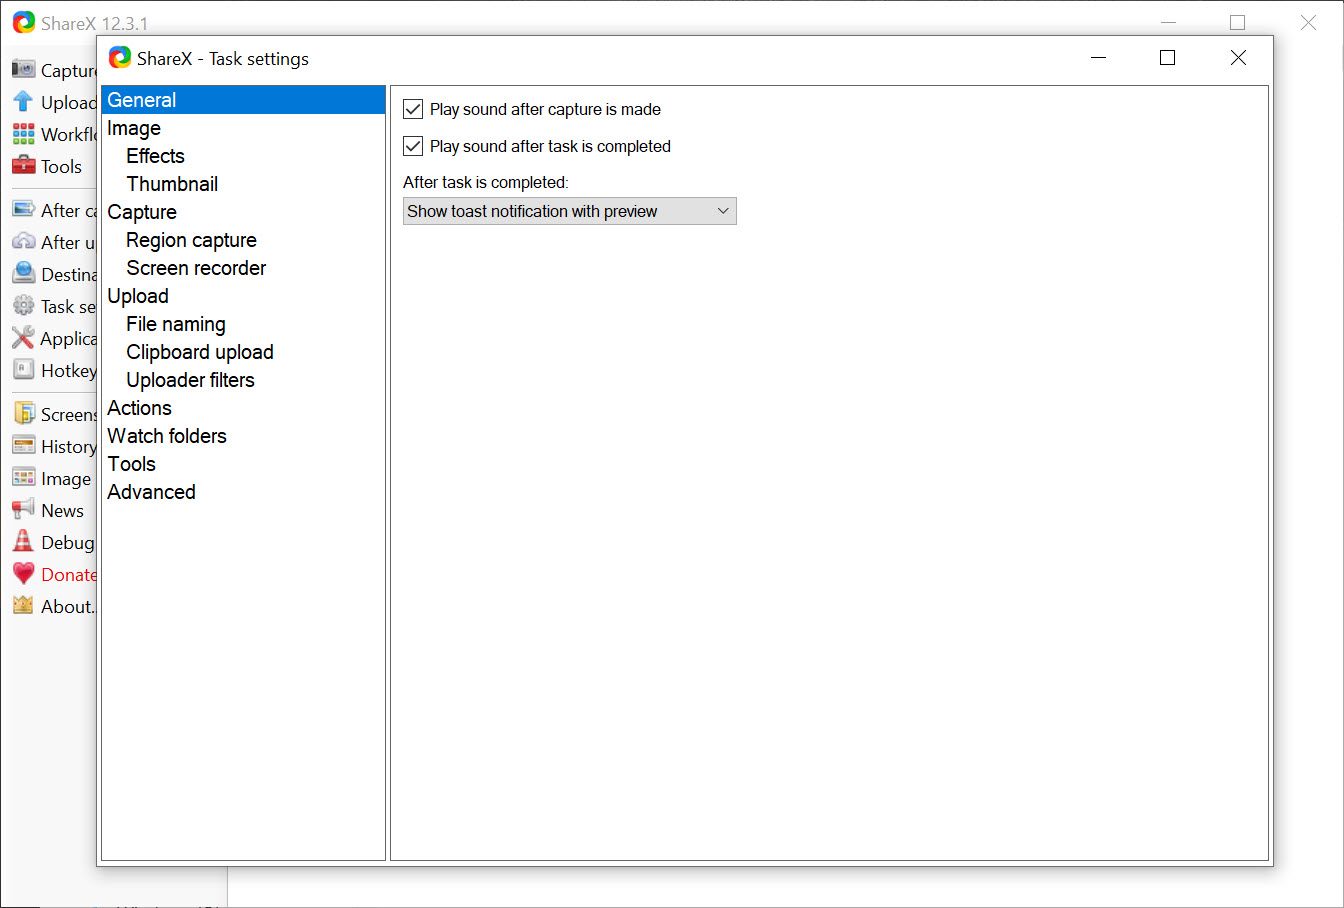
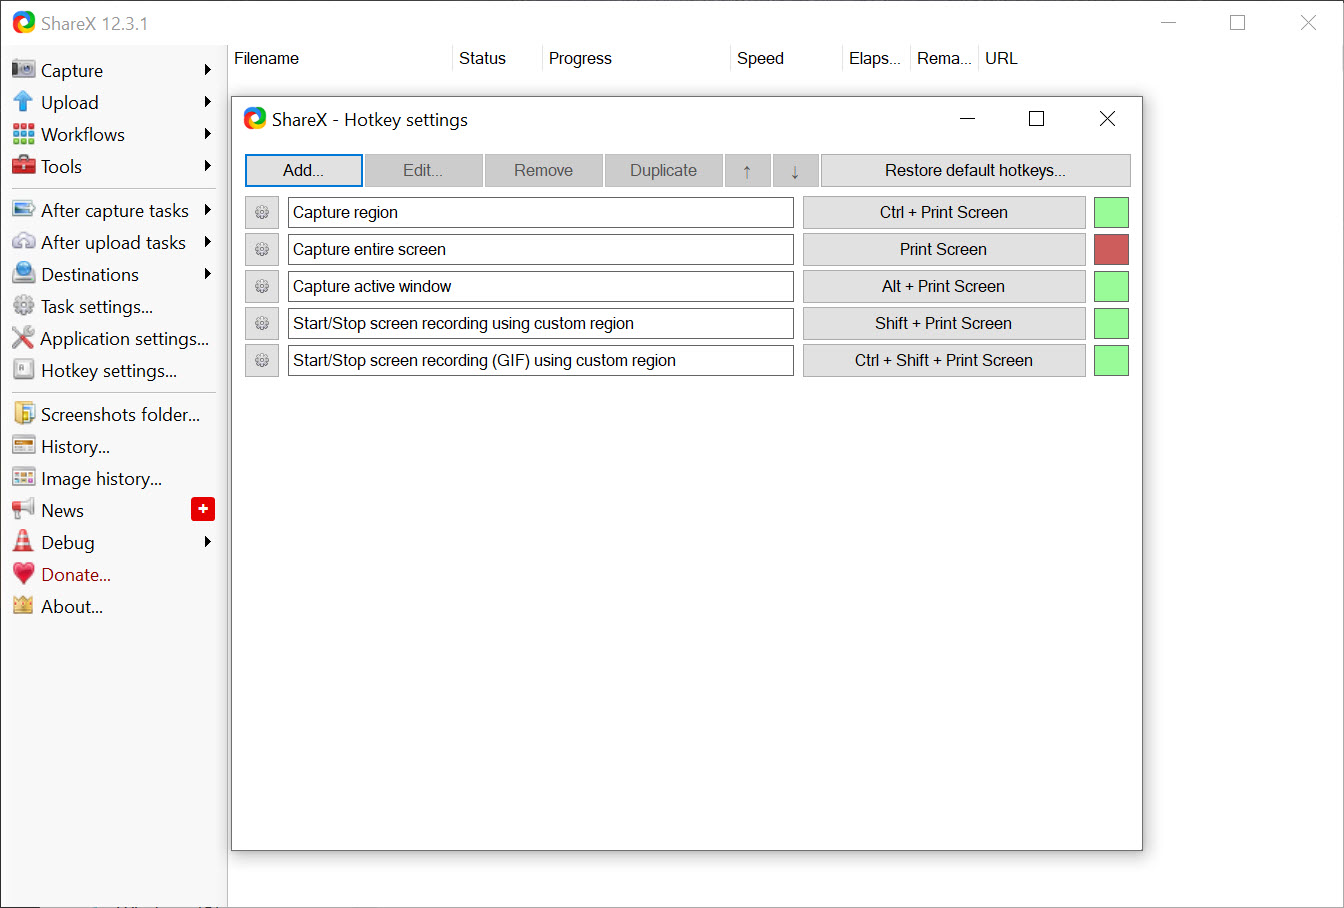
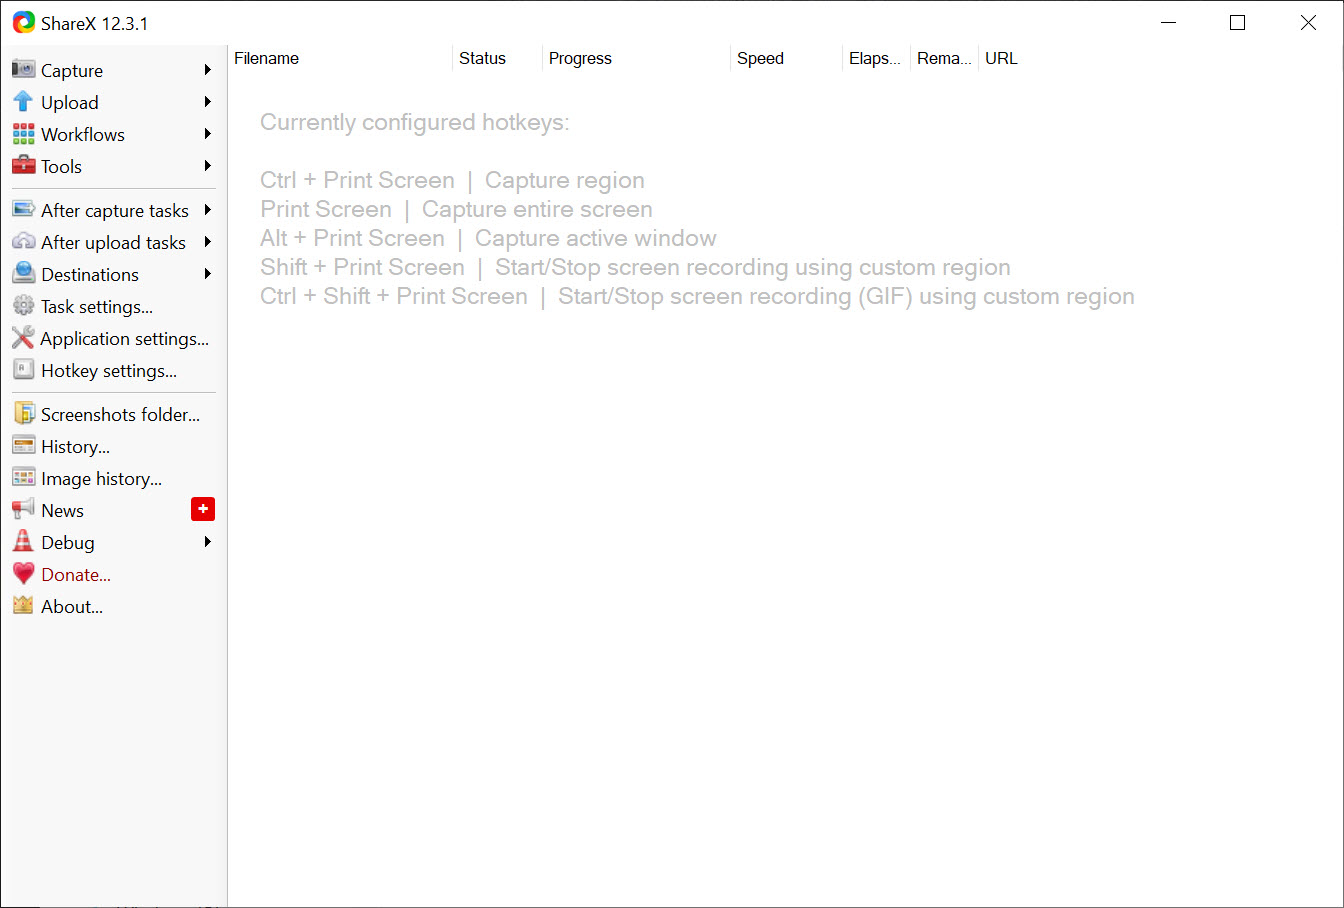
Use the screen recording hotkey (default Shift+PrintScreen) to start a region selection for recording, or configure a different hotkey for full-screen recording. The application records the selected area until you press the stop hotkey, then processes the file according to your configured workflow. Recording settings (frame rate, codec, audio source) live in the Task Settings panel under Capture > Screen Recorder.
Snipping Tool handles basic screenshot capture and minimal editing with a clean simple interface. ShareX offers an order of magnitude more capture modes, post-capture automation that doesn't exist in Snipping Tool, screen recording with audio, OCR, color picking, watermarking, and 80+ upload destinations. For users whose needs fit Snipping Tool, the simpler tool is fine. For users whose work involves capturing and sharing visual content frequently, this software's automation pays back the configuration time many times over.
After-capture tasks are the actions the application takes automatically after you grab a screenshot, before you ever interact with it manually. Standard tasks include opening the editor for annotation, applying watermarks, saving to a specific folder, copying to clipboard, and uploading to a destination. Tasks can be combined into chains that run sequentially, producing complete capture-edit-upload-share workflows from a single hotkey.


