PicPick


 (9 votes, average: 3.44 out of 5)
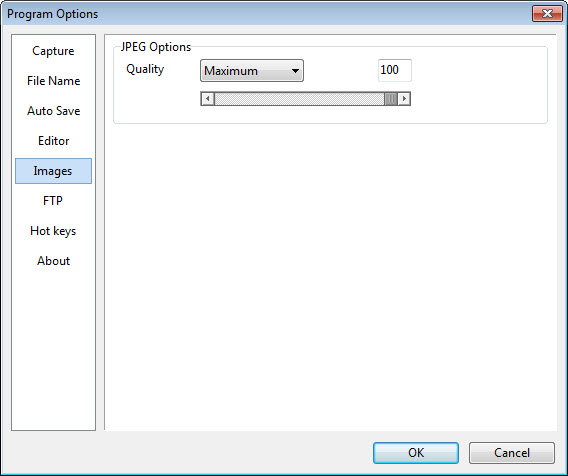
About PicPick
PicPick packs an entire desktop graphics toolkit into one program. Most users come to it for screenshots, then realize it also includes a color picker, a pixel ruler, a protractor, a magnifier, a crosshair, a whiteboard, and an image editor that handles layers, effects, and annotations. That bundle is the reason it has stuck around in front-end and IT workflows where you might otherwise install three or four separate utilities.
The screen capture side covers the usual scenarios (full screen, active window, region, freehand) plus a scrolling window mode that handles long webpages and chat logs in a single shot. The image editor opens automatically after a capture, so the loop from grab to annotate to export takes a few seconds.
Compared to bare-bones alternatives like LightShot or Greenshot, PicPick trades a bit of immediacy for a much wider feature surface.
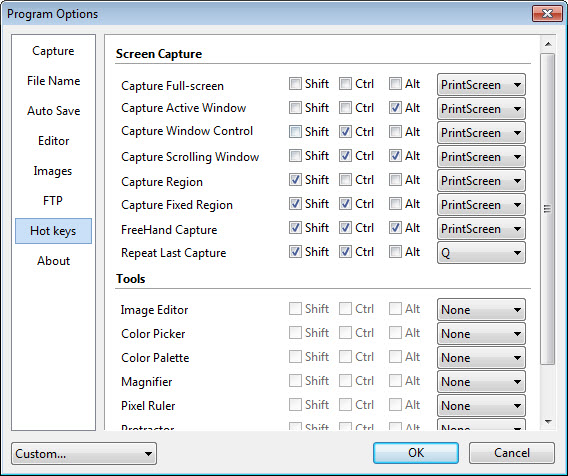
Capture modes that cover almost every scenario
You get seven capture modes, and each one has its own keyboard shortcut you can remap. Full screen is the obvious one. Active window grabs only the focused application, which is useful when you’re documenting one specific dialog. Window control captures a particular UI element inside an app (a single sidebar, a single button), and the selection snaps to the boundary automatically.
Region lets you drag a rectangle with pixel-precise dimensions shown live. Fixed region is handy for recurring captures at the same size, say 1280×720 for documentation. Freehand traces an irregular shape when the area you want isn’t rectangular.
The mode that does the real heavy lifting is scrolling window capture. It scrolls long pages or content panes and stitches the result into one tall image. It works most of the time, with some quirks on pages that use lazy-loading or virtual scrolling, where you’ll occasionally see a small seam or a missing block. Most browsers and document apps behave correctly.
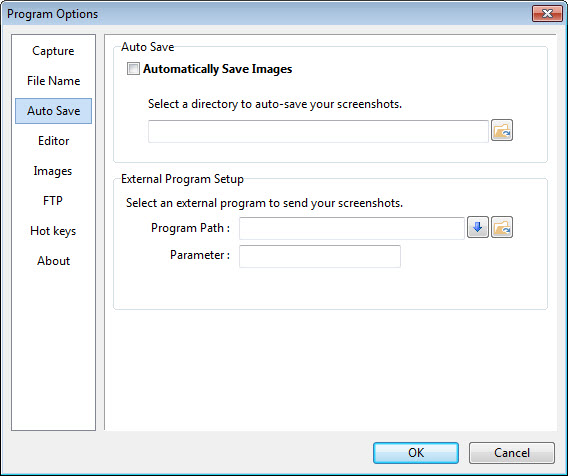
There’s also a delayed capture option (set 3 or 5 seconds) for grabbing menus and tooltips that disappear the moment you click.
A built-in editor that does more than draw arrows
After capture, the image opens in PicPick‘s editor. This is where the program separates itself from lightweight competitors. You get arrows, lines, shapes, callout balloons, numbered stamps, blur and pixelate (essential for redacting personal data in tutorials), shadow, watermark, and a text tool that supports rich formatting.
The editing canvas works with layers, though not in the heavyweight sense of Paint.NET or GIMP. Layers here mean each annotation stays editable as a separate object until you flatten the image. You can move that arrow you drew three minutes ago, resize a callout, change the text color, all without redoing the screenshot.
The crop, resize, and rotate tools include preset aspect ratios for common documentation outputs. There’s also a frame and border generator that’s surprisingly useful when assembling step-by-step guides, since consistent borders are exactly the kind of detail that makes documentation look professional.
What it doesn’t do: heavy retouching, clone stamps with brushes, advanced selections, photographic adjustments. If you need to clean up a portrait or work on a RAW file, this is the wrong tool. For annotating screenshots, it’s almost everything you need.
Graphic design accessories most capture tools skip
Open the main interface and you’ll see a row of tools that have nothing to do with screenshots. These are the accessories that make PicPick different.
The pixel ruler floats over any application and measures distances on screen in pixels, with horizontal and vertical orientation and a zoom-friendly readout. Useful when you’re checking whether a button matches a spec, or comparing two designs.
The protractor measures angles between any two points on screen. Niche, but if you’ve ever needed it you know why it matters. The crosshair gives you a movable cross that helps with pixel-level alignment work.
The magnifier is a floating lens at 200% to 1600%, with locked positioning if you need to zoom into a fixed area while doing something else.
The whiteboard is a transparent overlay you can draw on top of any application, similar to what Epic Pen provides, useful during screen sharing in meetings or for marking up something live before screenshotting it.
These tools are not afterthoughts. They actually work, and they’re the reason a lot of designers keep PicPick running in the system tray even when they’re not screenshotting anything.
Color tools for designers and front-end developers
The color picker reads any pixel on screen and reports values in HEX, RGB, HSV, CMYK, and HTML format. You can copy directly to clipboard in the format you need, which saves the conversion step when you’re matching a brand color in CSS or extracting palette values from a reference image.
The color palette stores swatches in a small floating panel and exports to Adobe Color Table or simple text. Not as deep as a full design tool, but for grabbing five or six colors off a webpage and dropping them into a project, it’s faster than a dedicated app.
Calibration is a known limitation. The picker reads what’s on screen, which means it picks up the actual rendered pixel including any color profile transformations. For print-accurate work you’ll want a hardware calibrator and a real color management workflow. For web work it’s fine.
Screen recording bolted onto the toolkit
PicPick includes a screen recorder that handles full screen, region, and window capture with optional webcam overlay and microphone audio. Output is MP4 with H.264, at frame rates up to 60 fps depending on your hardware.
This is not the headline feature. It’s competent for short tutorial clips and meeting recordings, but it lacks the deeper options you’d find in dedicated recording or workflow tools like ShareX, things like multi-monitor mixing, scriptable hotkeys, or fine-grained codec control.
If video is your main use case, look elsewhere. If you occasionally need to record a 30-second walkthrough alongside your screenshot work, this works.
Sharing and output options
Captures and edited images export to PNG, JPG, BMP, GIF, and PDF directly. You can save to Word, Excel, or PowerPoint as inline images, which is the path most people use when assembling documentation or training materials.
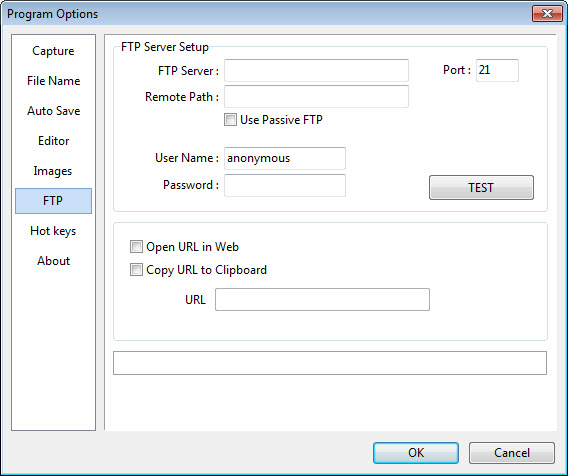
Built-in destinations include FTP/SFTP upload, email (via your default client or SMTP), Dropbox, Google Drive, OneDrive, Imgur, Facebook, and a few others. The integrations are configured per-account and remember credentials, so the second screenshot to your Dropbox folder is one keystroke.
A few destinations occasionally need re-authentication after token expiry, which is mildly annoying but normal for any tool that talks to cloud APIs.
Conclusion
PicPick earns its place in the toolbox of anyone who lives in documentation, support, QA, or front-end work, where a screenshot is rarely just a screenshot. It captures what you need, lets you annotate it cleanly, and gives you a small armory of design accessories that you’d otherwise hunt for in five separate utilities. The whole thing runs from the system tray and stays out of the way until you summon it.
Where it falls short is at the edges of its scope. Heavy video production, color-managed print work, and serious photo retouching all sit outside what PicPick is built for, and the recorder in particular is a notch below what a dedicated recording tool gives you.
For the documentation-and-design middle ground, though, it’s hard to beat in a single install.
Pros & Cons
- Seven distinct capture modes including reliable scrolling window capture
- Annotation editor with editable layers and a deep set of markup tools
- Bundles pixel ruler, protractor, magnifier, crosshair, and whiteboard in one app
- Color picker outputs in every format a designer or developer needs
- Direct export to Office formats for documentation workflows
- Cloud and FTP destinations configurable with saved credentials
- The recorder is functional but shallow compared to dedicated recording tools
- Color picker reads rendered pixels and isn't suitable for color-managed print work
- Scrolling capture can stumble on lazy-loaded or virtualized pages
- Interface density can feel cluttered for someone who only wants a quick snip
Frequently asked questions
Full screen, active window, window control, region, fixed region, freehand, and scrolling window. Each one has a configurable keyboard shortcut.
Yes, the scrolling window capture mode handles long pages by auto-scrolling and stitching the result into a single image. It works on most browsers and document panes, with occasional issues on pages that load content dynamically.
Yes, in the sense that each annotation (arrow, shape, text, callout) stays editable as a separate object until you flatten the image. It is not a full layer-based editor like the application you'd use for photo retouching.
HEX, RGB, HSV, CMYK, and HTML. You can copy the value to clipboard in any of those formats with a single click.
Yes, the recorder captures full screen, region, or window with optional webcam and microphone audio, exporting MP4 with H.264.
Yes, the combination of editable annotations, callout balloons, numbered stamps, and direct export to Word, Excel, and PowerPoint makes it well suited to writing step-by-step guides and product docs.
The whiteboard tool draws on a transparent overlay above any running application, which is useful during screen sharing or live demos.