

RMPrepUSB
About RMPrepUSB
RMPrepUSB prepares a flash drive to boot. It partitions and formats the stick, writes a boot sector for whichever loader you pick (grub4dos, Syslinux, the DOS family or the standard system boot manager) and copies your files across. Then it boots the finished drive inside an emulator so you can check the menu without restarting the computer.
Around that it collects the utilities you end up wanting anyway. A speed test, a raw image writer and reader, a sector-level clean, a fake-capacity test and an editor for the boot menu.
Where Rufus takes an ISO and produces a bootable drive in three clicks, RMPrepUSB hands you the individual steps and expects you to know why you want each one. That is deliberate. It exists for building multiboot drives by hand, for reviving machines with awkward BIOS firmware, and for the person who has already tried the three-click tool and needs to see what it did.
Partition, format, choose a boot sector
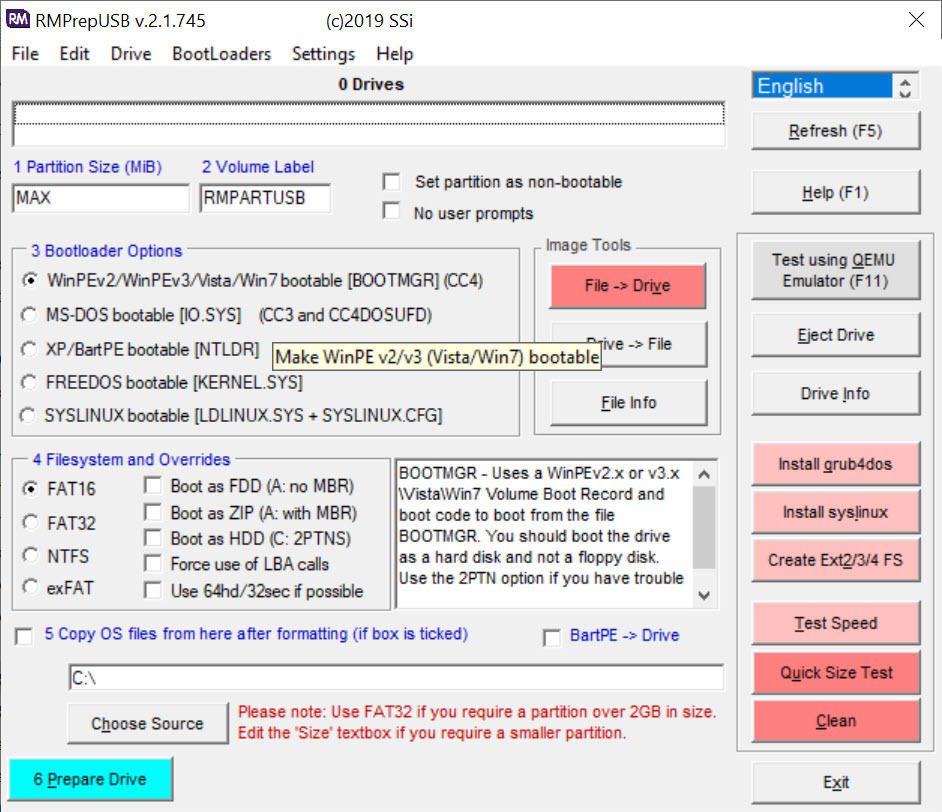
The main window is one screen of numbered steps. Set a partition size or take the whole drive, type a volume label and pick a bootloader from a column of radio buttons. Choose a filesystem from FAT16, FAT32, NTFS or exFAT, and optionally point at a folder of files to copy after the format. Prepare Drive runs the lot.
The bootloader choice writes the matching partition boot record, so a Syslinux drive, a FreeDOS drive and a drive that boots the standard boot manager differ only in which button was down.
Two settings here matter more than they look. Boot as HDD versus Boot as FDD changes the drive geometry reported to the firmware, and older machines that refuse a stick in one mode often accept it in the other.
And the drive list hides fixed disks by default, with a checkbox to show them, which is the single most important safety feature in the program. Leave it unticked unless you mean to wipe an internal drive.
grub4dos, the menu and QEMU
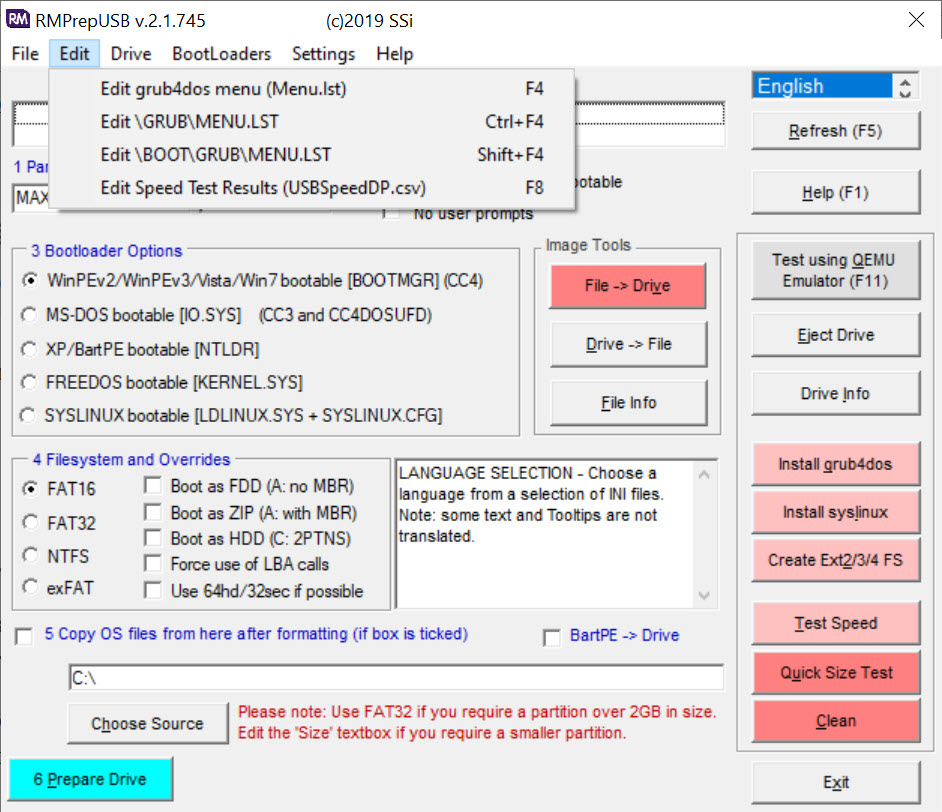
The Install grub4dos button writes that loader to the master boot record or the partition boot record and copies its grldr file to the drive. Press F4 and the menu file, menu.lst, opens in a text editor. That file is the whole multiboot system. Each entry names an ISO, a disk image or a folder of files and tells the loader how to start it, and the tutorials that grew up around RMPrepUSB are largely collections of these entries.
Then comes the part no other formatter offers. Click QEMU and the drive boots inside a small virtual machine on your desktop, with write access, so a typo in the menu shows up in seconds rather than after a reboot. It is slow, it is BIOS-only, and it will not tell you whether a stubborn laptop will accept the stick.
It will tell you whether your menu is right, which is most of the battle.
Speed test, fake drive check and raw images
The RMPrepUSB Speed Test button measures sequential read and write and appends the result to a CSV file, so a drawer of anonymous sticks can be ranked in ten minutes. Alongside it, a quick size test writes and verifies patterns across the drive to expose counterfeit capacity, the 128 GB stick that stores 8 GB and silently corrupts the rest. Anyone buying flash drives from marketplaces should run it once on every arrival.
File to USB and USB to File write and read raw images sector by sector. That is how you back up a finished boot drive to a single file and restore it to a second stick. It is also how you write an image supplied as a raw file rather than an ISO.
Clean wipes the first sectors so a drive with a confused partition table becomes blank again. For writing an ISO and nothing else, a tool that writes images and verifies them is more direct, but the imaging here is fine for the round trip.
The smaller tools in the menus
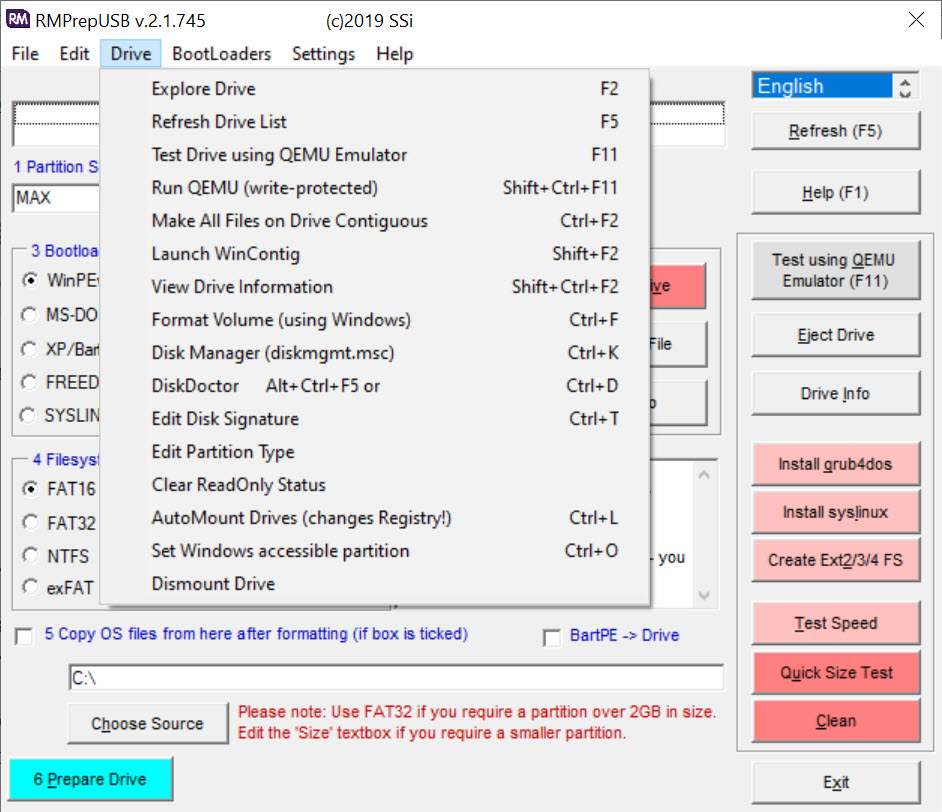
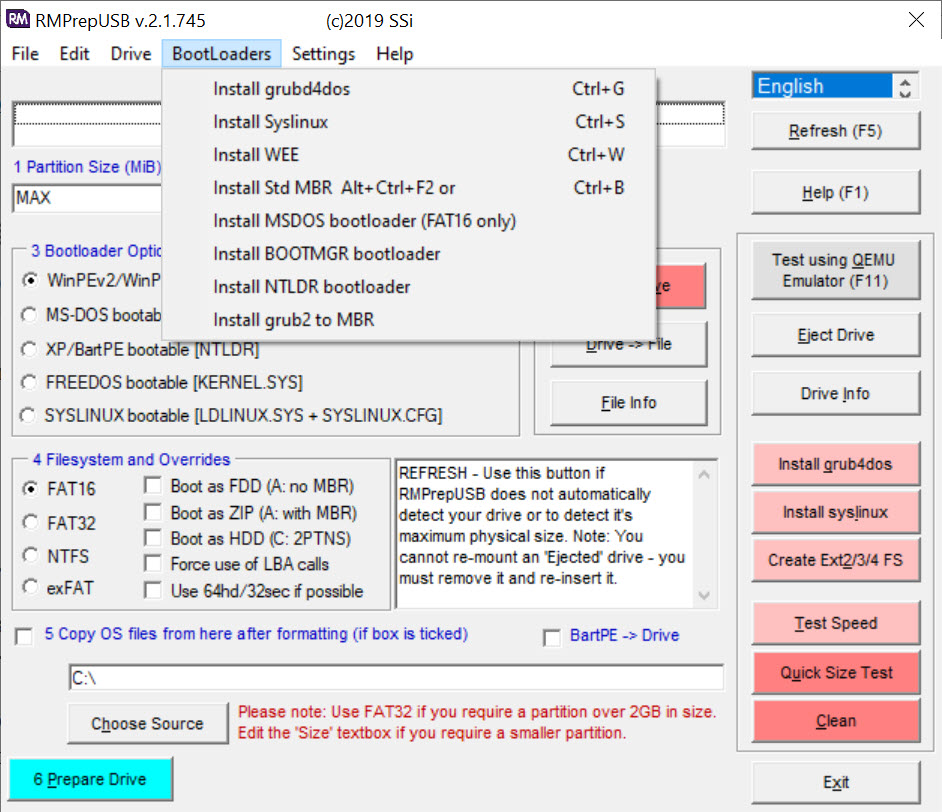
Behind the main RMPrepUSB screen sit a dozen shortcuts. Create Ext2 makes a filesystem inside a file for live-system persistence, the casper-rw trick. Extract copies the contents of a ZIP or ISO straight onto the drive. A checksum command computes MD5, CRC32 and SHA1 for any file. Install WEE puts a tiny embedded loader in track 0 for machines that will not boot grub4dos. Standard MBR rewrites the master boot code while leaving the partition table alone, and a command changes the disk signature when two drives collide. Drive Info and File Info dump partition and image details.
Every operation is also available from a companion command-line program, so a repeatable build can be scripted once and run on twenty sticks. The main window itself will save the current settings to an ini file with F10, which is the same idea with less typing.
Where it stops
Everything here assumes legacy BIOS booting. grub4dos, Syslinux as installed from this program and the QEMU test all operate in that mode, and a machine set to UEFI-only with compatibility support disabled will not see the drive. RMPrepUSB can format a drive that a UEFI loader is then copied onto, but it will not build the UEFI side for you.
The other limit is that it never became easy. The step-by-step layout has not changed, the manual is a sprawl of tutorials, and the menu file has to be written by hand. That is why Easy2Boot grew out of it, taking the same drive preparation and adding a menu that builds itself from whatever ISO files you drop into a folder.
If you want that result rather than the education, start there and come back here for the tests and the imaging.
Conclusion
RMPrepUSB is for technicians and hobbyists who build boot drives by hand, need to test them without rebooting, and want one window that also measures, images, cleans the sticks they carry. The QEMU button and the fake-drive test alone justify keeping it around.
Anyone who simply wants an installer on a stick should use a three-click tool and never open this. And anyone whose machines are UEFI-only will need a different loader, because this one still lives in the BIOS era it was built for.
Pros & Cons
- Partitions and formats, then writes a boot sector for seven loader types, in one pass
- Boots the finished drive in QEMU with write access, no restart needed
- Speed test with a CSV log and a fake-capacity check
- Raw image write and read for cloning boot drives
- Hides internal disks by default, so wiping the wrong drive takes deliberate effort
- Legacy BIOS only, with no UEFI boot setup
- Menu files must be written by hand
- Dense, unchanged interface with a steep first hour
- QEMU test is slow and cannot predict real firmware behaviour
Frequently asked questions
The machine is set to UEFI-only. The loaders this program installs are BIOS loaders. Enable legacy or compatibility boot in the firmware, or use a tool that writes a UEFI-capable drive.
QEMU emulates a plain BIOS and accepts almost anything. Try switching between Boot as HDD and Boot as FDD in the main window and prepare the drive again, since many older machines want one geometry and not the other.
Copy the file onto the drive, press F4 to open menu.lst and add an entry pointing at it. Press the QEMU button to check that the entry boots before you rely on it.
Only if you tick the option to show non-USB drives, which is off by default. Leave it off unless you intend to erase an internal disk.


